Developing in a new environment with a new language can be intimidating. Every environment has its own quirks and nuances that might dissuade a developer from learning how to develop for a new platform. This article is intended to be a primer for developers that have experience developing ArcGIS apps on other platforms that would like to get started developing for iOS. It will cover the setup of the environment (assuming you already have a Mac) and provide two different ways of implementing a common GIS “Hello World” app (creating and displaying a map).
Apple’s Integrated Development Environment (IDE) is called XCode and can be downloaded for free from the App Store. XCode includes a full featured code editor and a device simulator so you can test your app on a wide variety of iOS devices. XCode is project based and uses a .xcodeproj file to define the project’s settings and properties. This file is created automatically when a project is initalized.
Section 1: Setting Up the Project
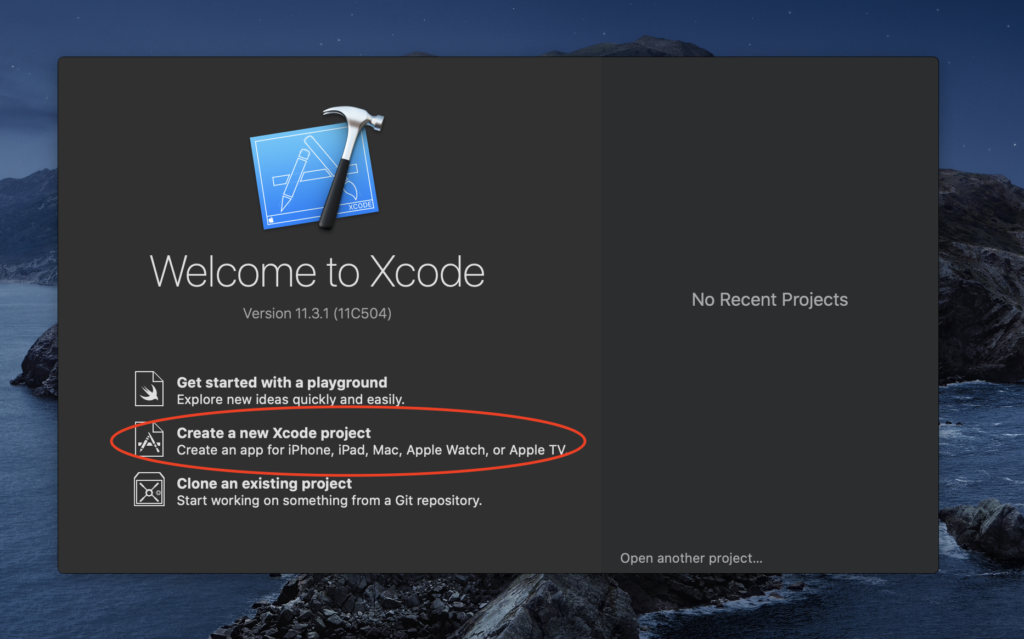
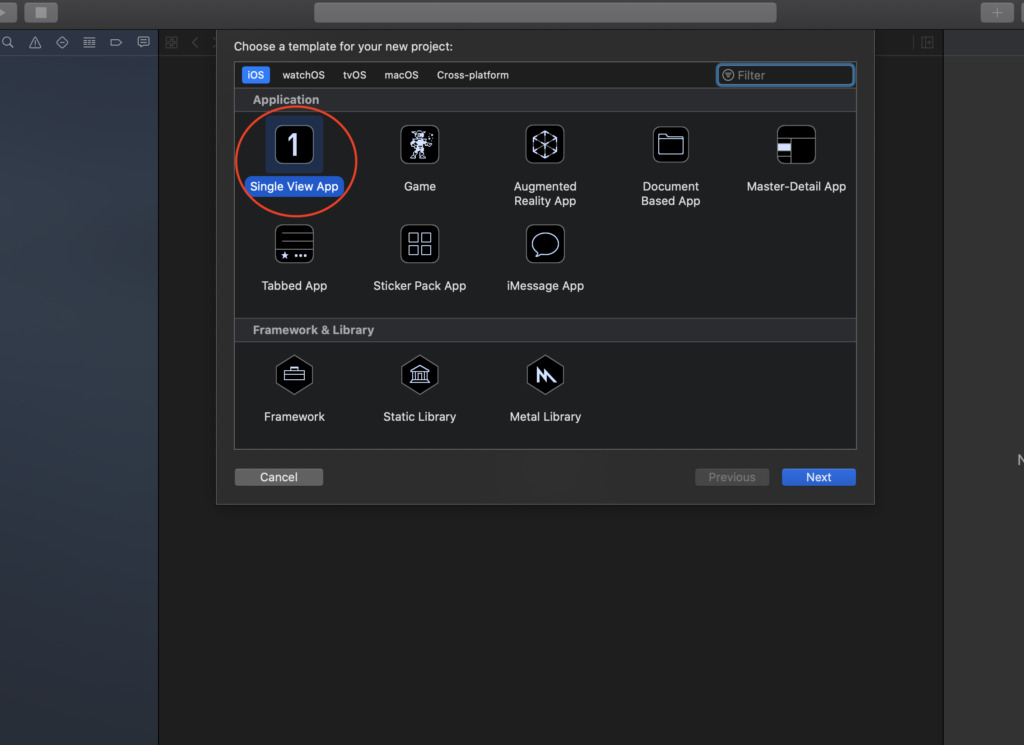
For this primer, we will create a single view app by opening XCode and selecting “Create a new Xcode project”, then “Single View App”, as shown below:
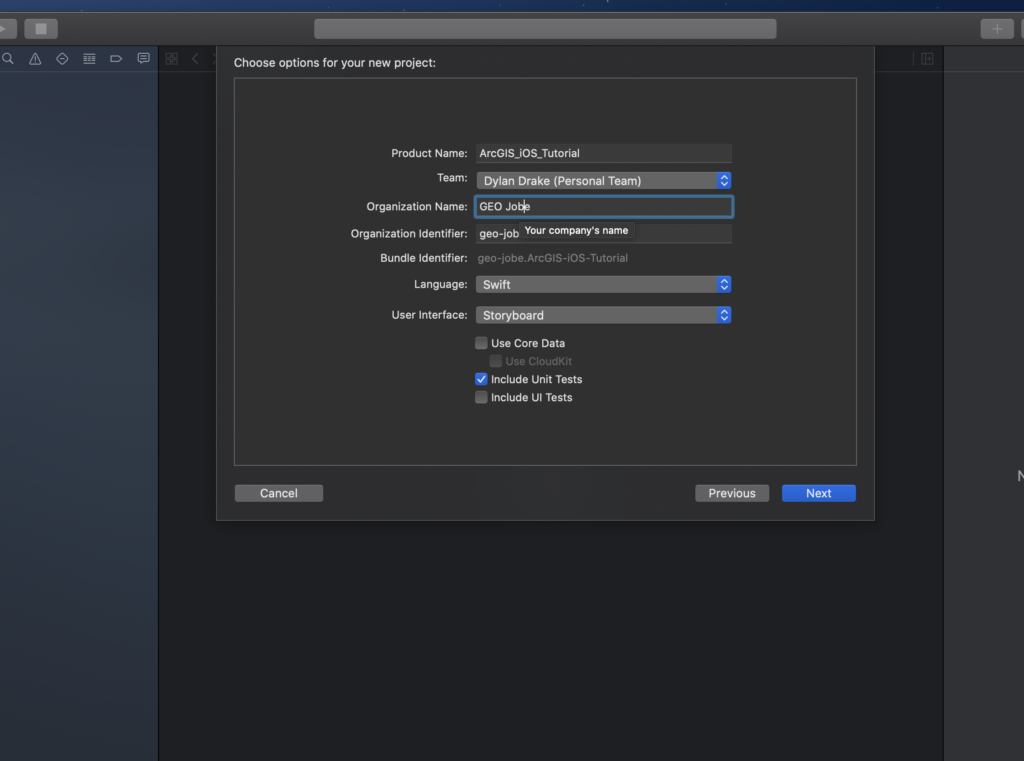
On the next screen, name your project and define your Organization Name and Organization Identifier (These are relevant when distributing your app and can be changed later. This article will not cover app distribution). Make sure the Language is set to Swift and the User Interface is set to Storyboard. It should look something like this:
After clicking Next, you should be taken to a new screen. This is the project settings file. Now that the project has been created, we need to install the ArcGIS iOS Runtime SDK. Esri provides easy to follow documentation on installation with two methods you can choose between described here (make sure to follow the instructions for Swift, not Objective-C). For this tutorial, the manual install method was chosen, but you can choose whichever method you prefer. The manual method boils down to downloading the SDK, installing it on your machine by double clicking the .pkg, dragging it into your XCode project, and pasting a one liner into the “Build Phases” of the project settings.
After installing the SDK, open the project directory explorer by clicking on the folder icon in the top of the left side panel, if it is not already selected, and select the file named ViewController.swift. Import the ArcGIS SDK and test if it is installed correctly by adding the following line of code under “import UIKit” like so:
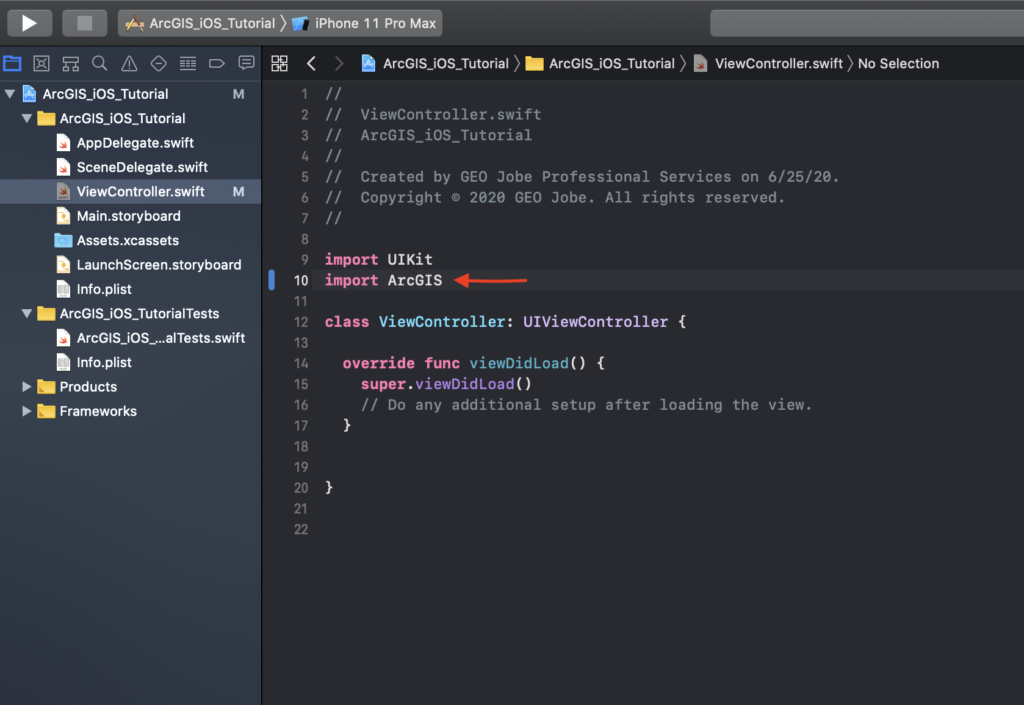
If XCode doesn’t produce an error message next to the import statement, then we should be all set to create and display an ArcGIS map.
You might have noticed that XCode tried to autocomplete your import statement. XCode has great code completion that will give you any valid options matching what you have typed. For example, if you forget a method’s signature, you can start typing the method name, and it will show any matching methods’ input parameter names, types, return type, and even a description of that method’s behavior. This can come in handy when learning a new API.
Now that we have a fresh XCode project with the ArcGIS iOS Runtime SDK installed, we can start coding our app. In order to explore as many aspects of iOS development as possible in this article, we will do this two different ways: programmatically with Swift code and visually with Storyboards. Storyboards are XCode’s tool for creating the UI and flow of the app using Views and Segues (segues will not be covered in this article since we are creating a single view app).
iOS development follows the Model View Controller pattern (MVC). As we progress through the example, it will become apparent how XCode and Swift implement the MVC pattern. The finished app will display an ArcGIS map with the Esri Streets basemap immediately when the app loads. First, we will create and display the map using only code. Then, we will demonstrate how to leverage Storyboards to reduce UI-setup-code so that our ViewController files can focus on handling user interaction and performing the subsequent app behavior.
Section 2: Render a Map Programatically
So, back to the ViewController.swift file. Notice that there is already some code in there. Swift has gone ahead and created an initial ViewController for us. You can see its code in this file and you can see how it is represented in the Storyboard by clicking on the Main.storyboard file in the file explorer. If you expand the ViewController’s hierarchy, you will see there is a View in there as well. (Hence the name Model View Controller) This View can be accessed in the ViewController’s code with self.view. Let’s go back to our ViewController.swift file by selecting it in the file explorer.
Swift is an object oriented programming language so the ArcGIS iOS Runtime SDK is also object oriented. The two classes we will be utilizing are the AGSMapView and AGSMap classes (one of the biggest differences between Swift and other OO languages is Optionals).
First, we create an object of both classes, as displayed below. Let declares a constant; var declares a variable.
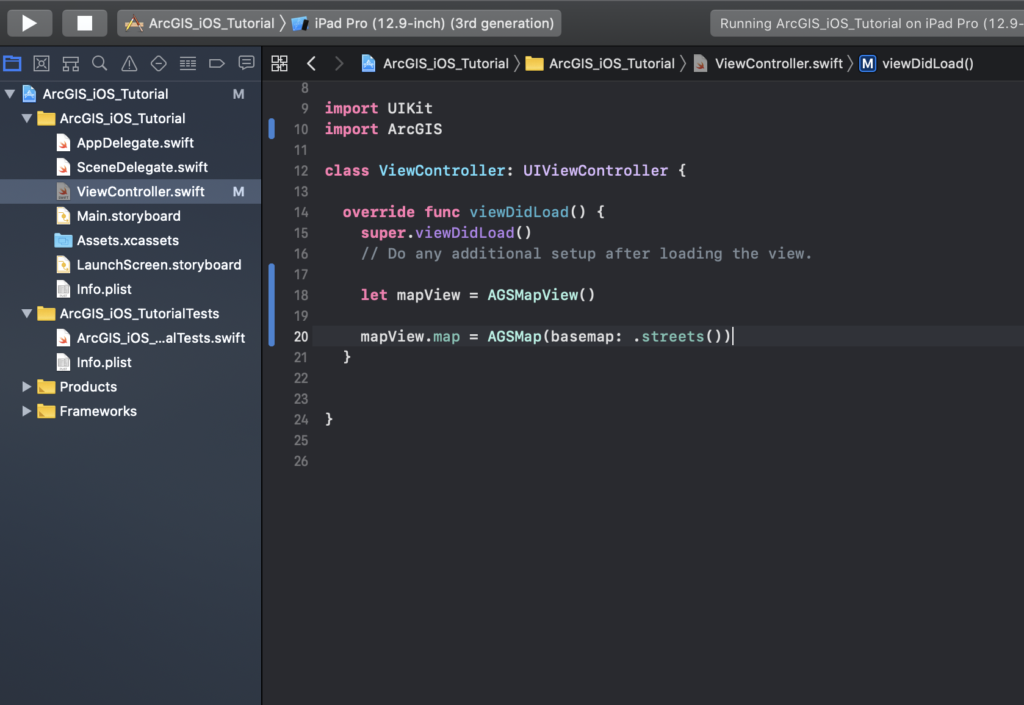
An AGSMapView is a view component responsible for displaying 2D maps. To give it a map, we first create an instance of AGSMap, then assign it to the map property of mapView. This only creates the map and the view that will display it. To display it we have to add mapView to the ViewController’s view hierarchy, after defining its size.
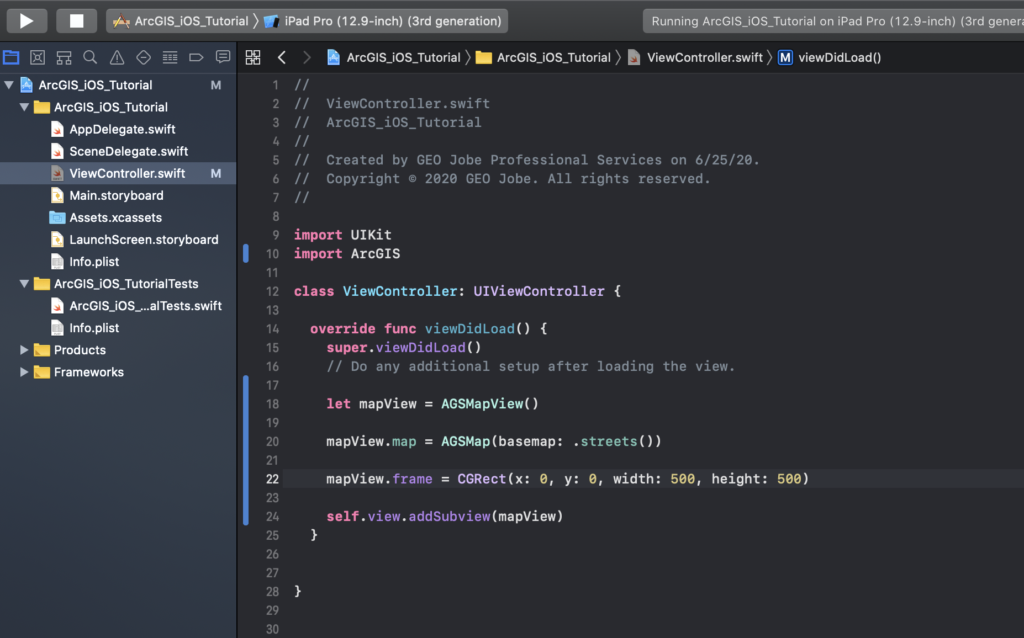
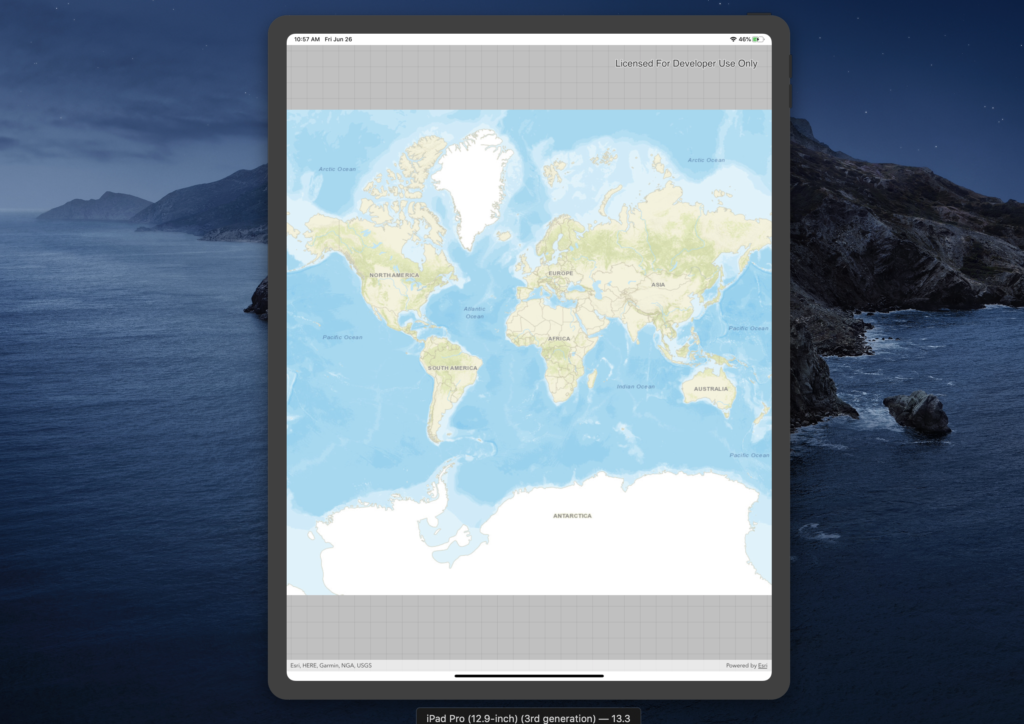
Click the play icon in the top left of XCode to run the app in Simulator. If there are no errors, XCode will build the application and run it on Simulator (you can change the device that Simulator emulates with the dropdown to the right of the Stop button). When the build completes, XCode should focus your desktop on Simulator, and you can see the map.
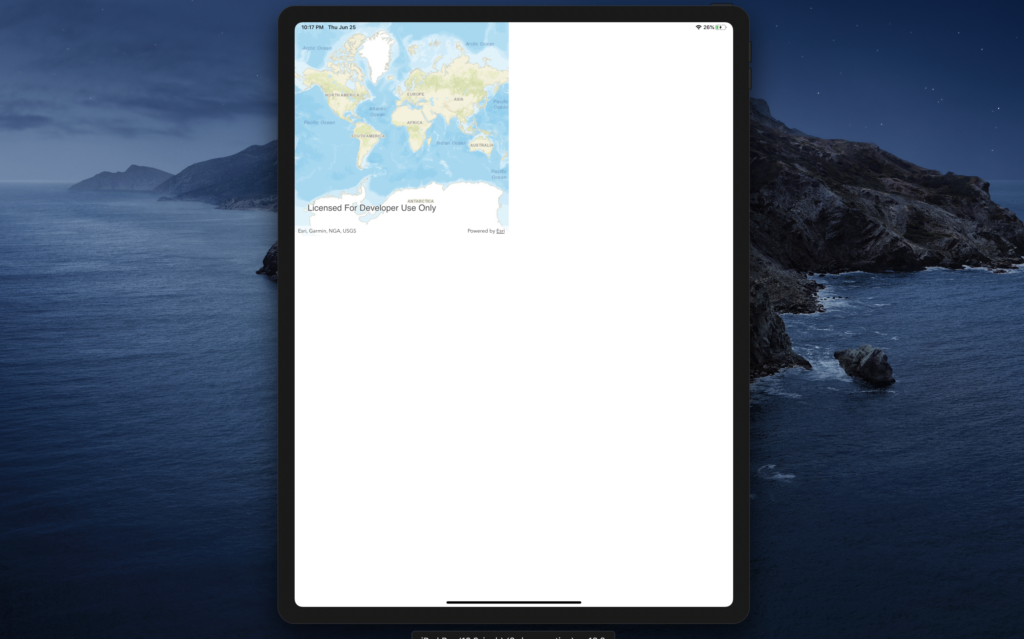
This obviously doesn’t look very good. To set the map’s edges to the edges of the screen, we have to add a constraint to each edge, which would look something like this:
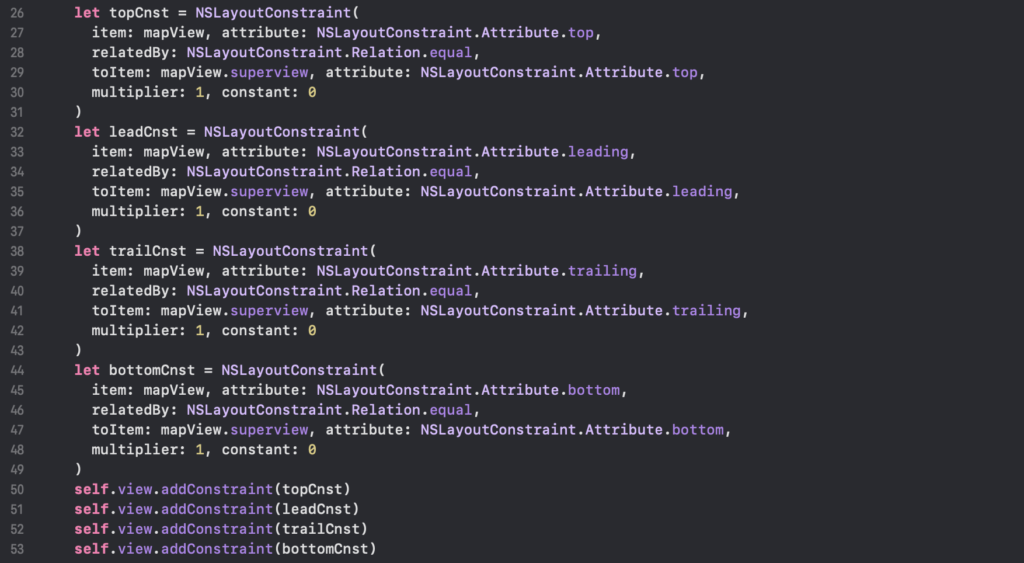
It’s easy to imagine how this can become quite cumbersome as the app’s UI gets more complex, not to mention how frustrating it would be to define our UI blindly in code and have to rebuild every time we want to test it. Let’s separate concerns and define our UI components and their constraints with Storyboards.
Section 3: Display a Map with Storyboards
In XCode you can build large portions of your app, especially UI, visually using Storyboards and connect them back to their ViewController so that you have a reference to it within the ViewController’s code. You can also handle user interaction by connecting actions back to the ViewController, where XCode will auto generate a handler function.
Now that we want to define our map view in Storyboards, let’s remove the code we added to ViewController.swift (XCode marks your code changes with a blue line next to the line numbers). To start using the storyboards, open Main.storyboard and expand the ViewController’s hierarchy until you get to the View.
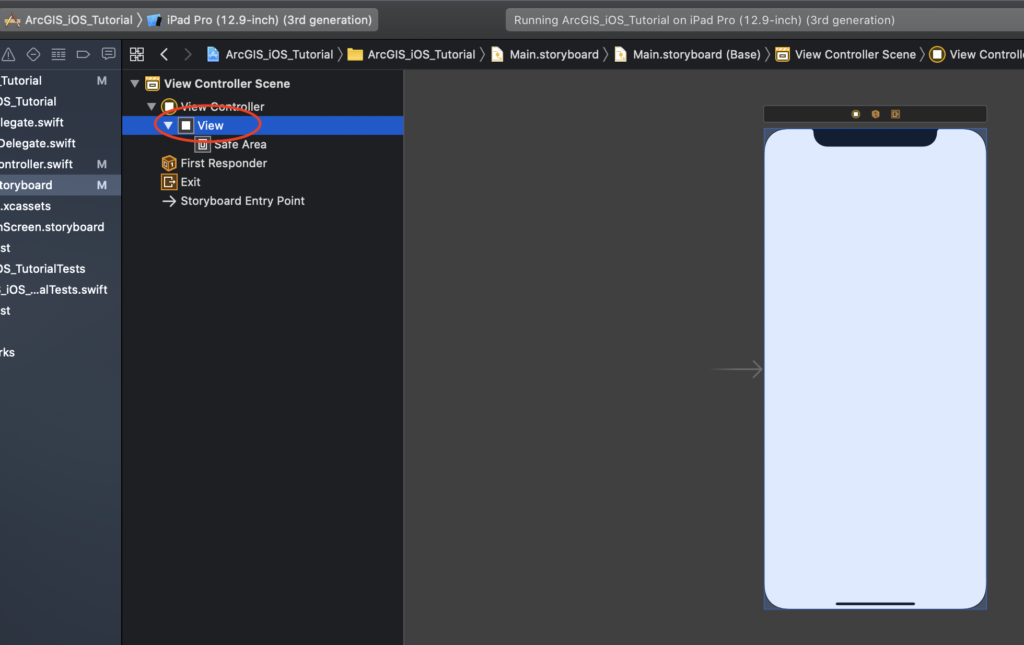
Now, click on the + sign in the top right of the XCode IDE. Type “view” in the search, scroll until you find the “View” component, and drag it into the View in the ViewController’s hierarchy. Click on the newly added view and notice the right side panel of XCode will show the properties of that component (if the right side panel is not open you can open it with the three button array in the top right corner of XCode). Make sure the middle tab is selected.
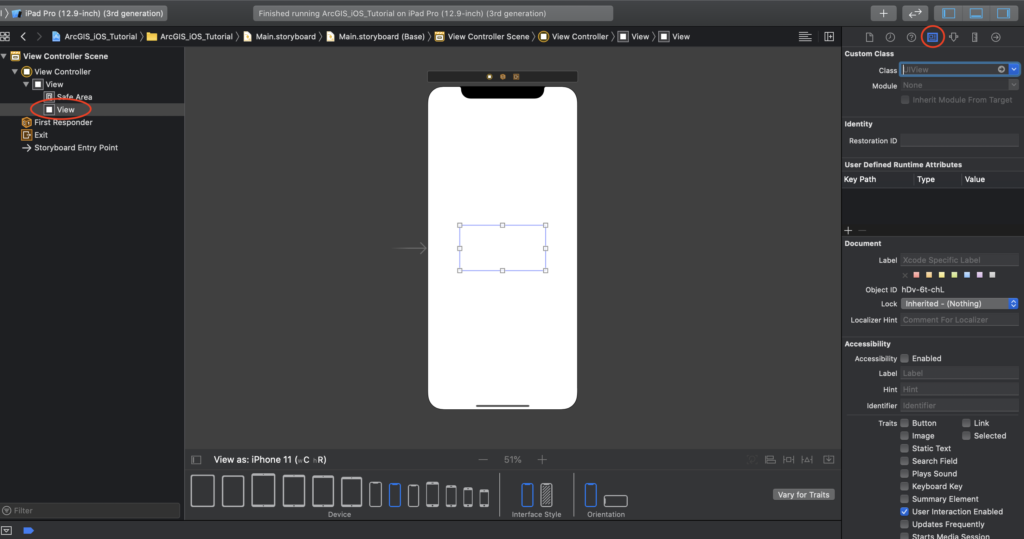
With our new view selected, let’s turn it into an AGSMapView. In the Custom Class section of the right side panel, type “AGSMapView” into the Class field.
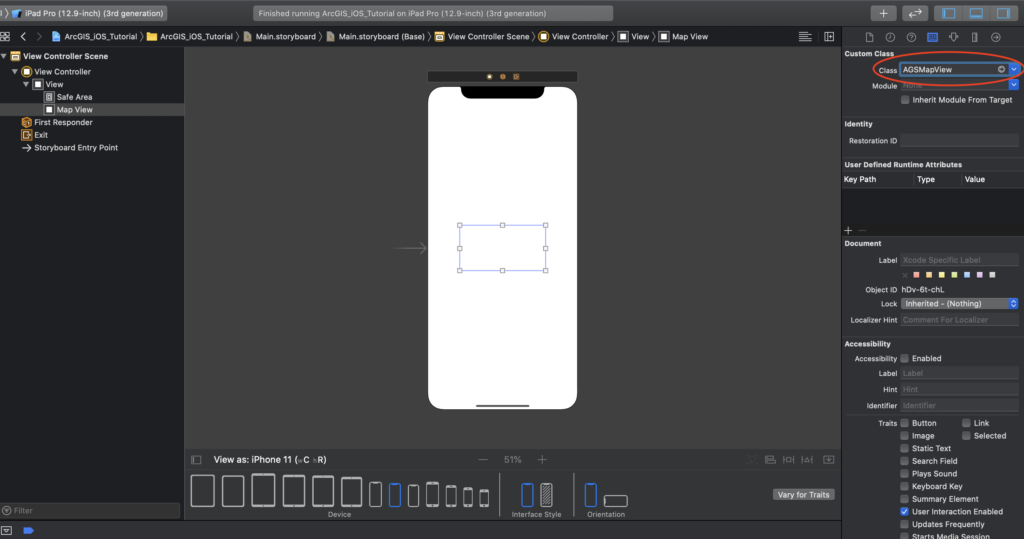
Next, connect the AGSMapView to the ViewController. To make it easier, split the editor into two side by side windows by clicking the split button, circled in red below.
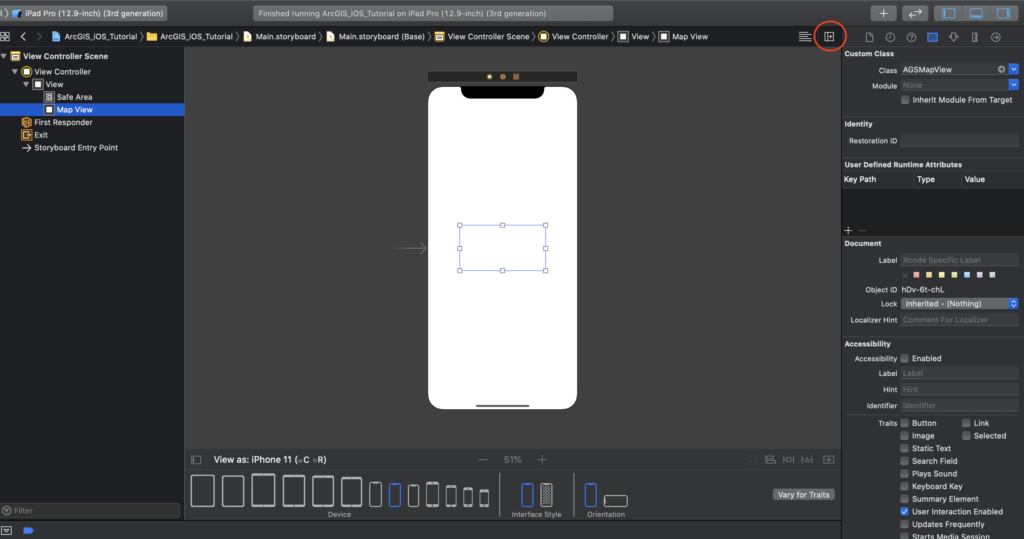
XCode will just duplicate the current editor. Click on ViewController.swift to open it in one of the windows. In the Storyboard editor window, CTRL + left click on the new Map View and drag it into the ViewController’s class definition like this:
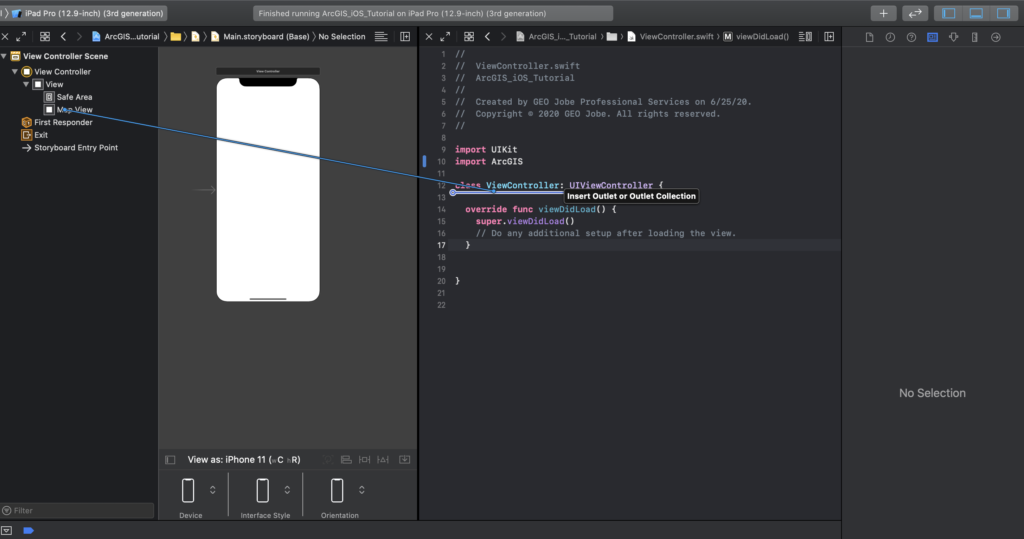
Release left click and type “mapView” into the resulting prompt. Now, we have a reference to the AGSMapView we created in the Storyboard. We still have to give it a map. We will do that the same way we did before, but this time we will reference mapView by first referencing the current object with self.
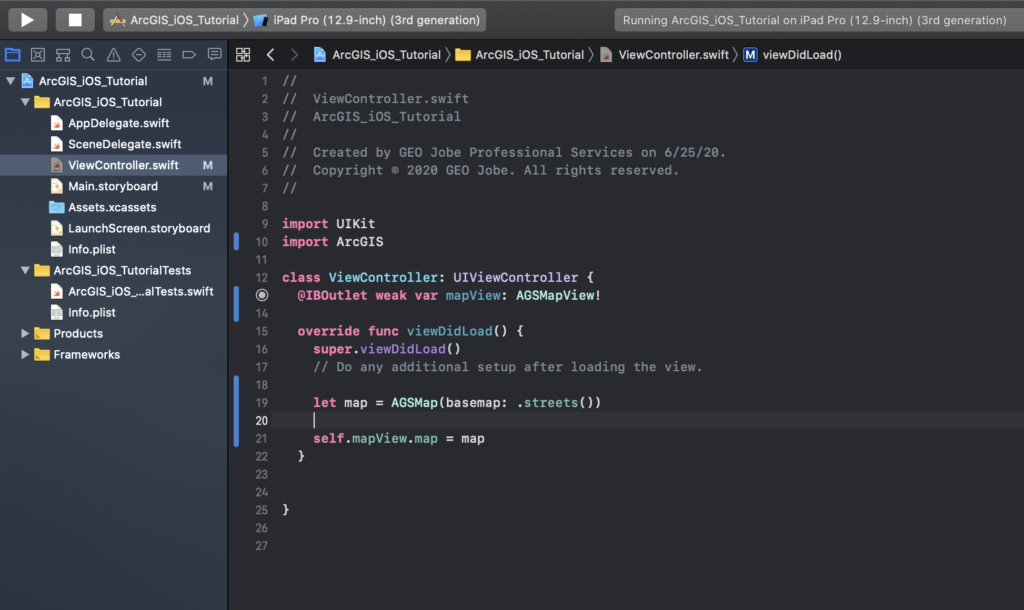
If we were to run the app now, it would display the map in a small square in the middle of the screen. We need to constrain the edges of the AGSMapView to the parent view’s edges. Navigate back to Main.storyboard and select mapView again. The button shown here is how you apply constraints to a UI component.
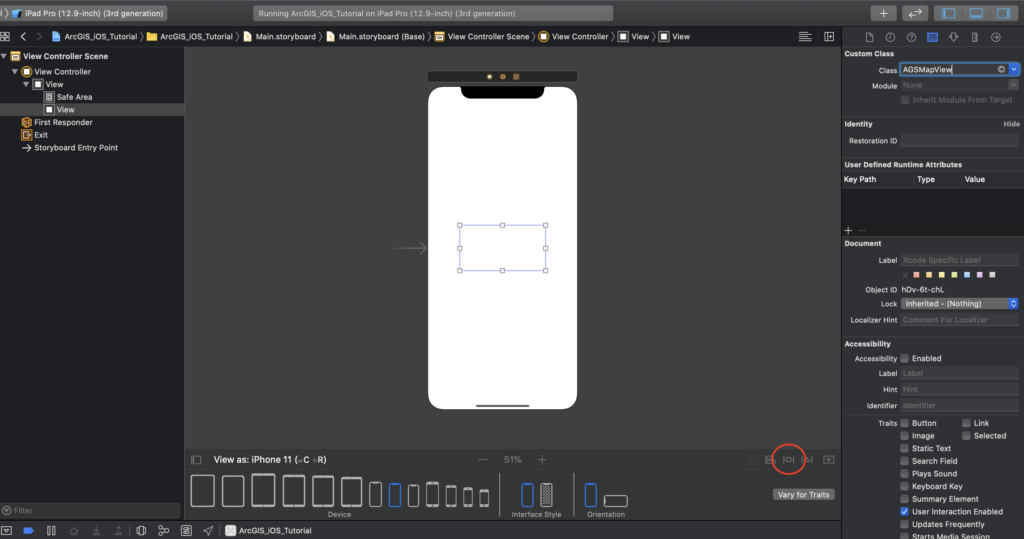
Pin the AGSMapView to the parent view by entering “0” to all four edge constraints and clicking “Add 4 Constraints” when finished.
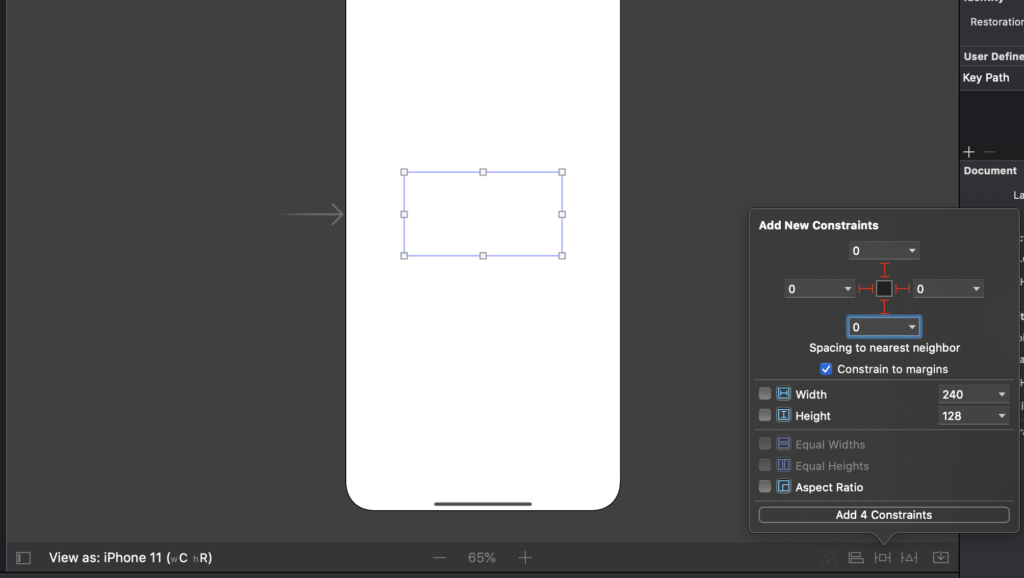
Notice the bounds of the map view are now pinned to the outer bounds of the parent view. Running the application will show a much better looking full screen map that you can zoom, drag, and rotate with touch gestures (apply touch gestures to the map with your mouse. Hold Option to add a virtual second finger for pinching and expanding.).
Conclusion
This was a quick and dirty introduction to developing ArcGIS iOS apps which should be enough to get an experienced developer up and running. Some recommended next steps to fill out your iOS and ArcGIS knowledge would be to familiarize yourself with XCode’s interface, learn more about the Swift programming language (especially Optionals) and explore the ArcGIS Runtime SDK for iOS.


