
Backup My Org has become one of our most popular and requested solutions for anyone interested in custom backups, custom restoration, and the migration of ArcGIS items, groups, and users. If you’re interested in Backup My Org, and how this application works from a practical perspective, here’s a basic guide to get started. This will be a two-part blog article. Part 1 focuses on setting up Identities in the application and performing Backups of content.
Identity Manager
After getting Backup My Org installed, the first required action is to set up relevant identities in the Identity Manager. This is how the application interacts with the connectors licensed to be used. This manager divides the connectors into two categories: ArcGIS Online Organizations, and ArcGIS Enterprise Organizations. Adding or editing an identity consists of setting up the following:
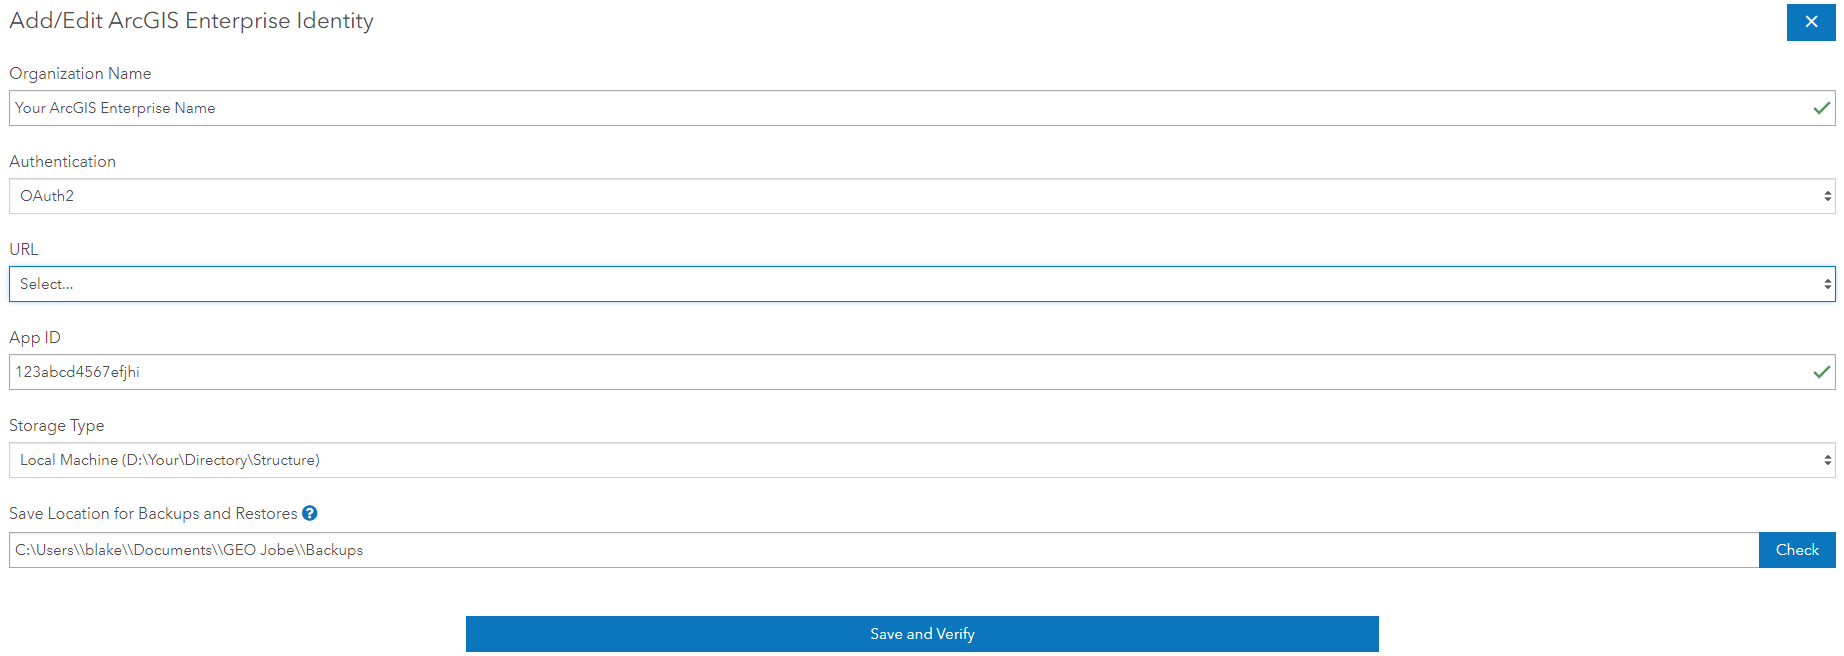
Organization Name: This is simply the name that Backup My Org will associate for each particular connector.
Authentication Type: For ArcGIS Enterprise options are provided here for selecting authentication type (oAuth and IWA)
URL: This is the ArcGIS Enterprise or ArcGIS Online URL endpoint used to connect to the specific ArcGIS Organization.
App ID: This is for ArcGIS Online or for ArcGIS Enterprise Organizations using SAML login. This is the App ID of the item to reference inside the Organization. Instructions on how to set this up are included in the help documentation of Backup My Org, or found online, in the GEO Jobe Knowledge Base. Note that an App ID is not required for Integrated Windows authentication (IWA).
Storage Type: This is the type of storage the Backups will be saved to and restored from. Currently supported storage types for Backup My Org include local storage and Amazon S3 Bucket with future supported types such as Microsoft Azure Blob and Google Cloud Storage coming soon.
Save Location for Backups and Restores: This is where backups will be stored and where restores will be accessed from. A great tip is to set up a different folder for each identity (connector) for the best possible organization of backups and what they belong to.
Backing up Content
Once the Identities are configured and saved, Backups are ready to begin. Selecting the Backup button on the homepage provides three options:
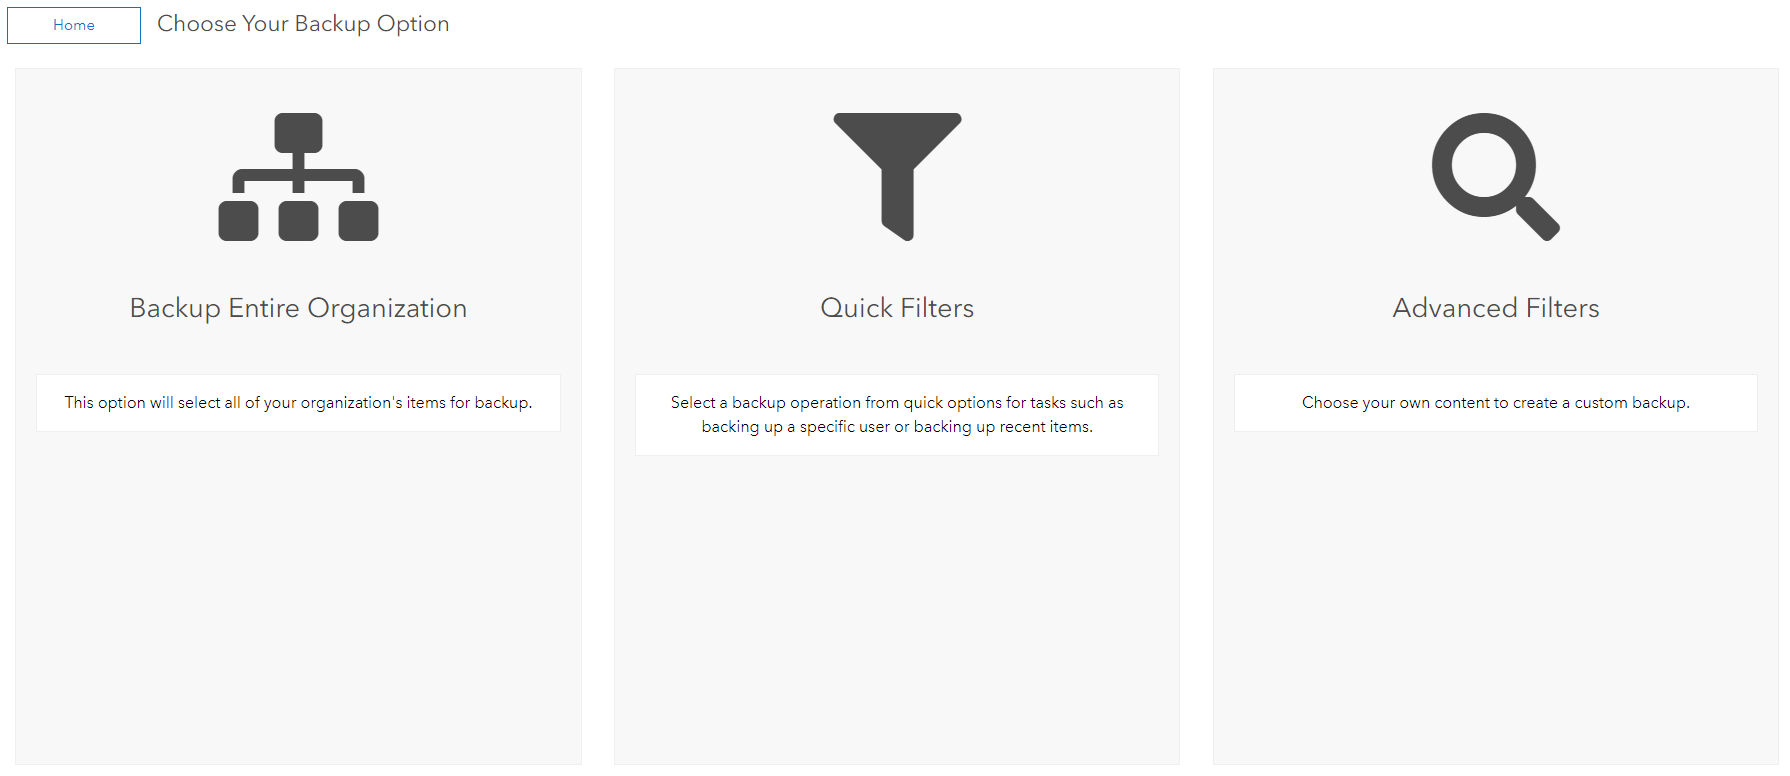
Backup Entire Organization: As the name suggests, this is the option to perform a comprehensive backup of all items, users, and groups in the ArcGIS Organization.
Quick Filters: These provide ready-made filters that are already formatted and represent some common backup needs, and are a bit more granular than the “Backup Entire Organization” option. Use this option to perform a backup of a filtered subset of items, users, or groups, without having to backup any single specific piece of content.
Advanced Filters: This provides the highest degree of granularity for backing up content. Use this to backup specific items, users or groups, selected from a grid based on any number of customizable filters..
Once the appropriate backup option to perform is chosen, proceed through the next steps, which include the following:

This sets up how the backup will be handled. This includes the specific connector identity to backup from, a custom name to identify and reference this backup from, and email notification based on configured email settings, the option to skip the dependencies visualizer, as well as retention options to keep backups for a configurable period of time before deleting. These options also include an experimental feature to backup registered features as hosted
Content Selection: The options here are based on which type of backup is being performed. For example, in the Advanced Backup, Items, Groups or Users can be selected from the connector Organization by navigating the related tabs and hitting the ‘Add (Item/Group/User)’ button. After that, the main selection page is returned to, and there is the option to select or remove content from the list of items before proceeding.
Backup Preprocessing:

This is an important final step before the process of backing up begins. It will scan all selected content for dependencies and provide an informative, easy to understand, and fully interactive visualizer of that content allowing for additional review and selection of dependencies to backup. There is also an option to switch to a more itemized verbal view content, as well as tools for more robust selection or deselection of content on this page before finally confirming and starting the backup.
This covers the basics of setting up Identities, and performing a backup of your ArcGIS Content. Next week, we’ll cover restoring content and the cloning operation. If you are interested in this solution, please visit our Backup My Org Product Page. If you have any questions about this application, please feel free to reach out to us at connect@geo-jobe.com.