


Understanding version control and how to use it is very important. That’s why we’ve been slowly building out a series of articles on the topic. We have previously discussed the importance of version control, and the various types of version control systems. Today, we’ll continue our series with a basic tutorial on how to use Git. Git is a distributed version control system, and the one we use most commonly at GEO Jobe.
Installing GIT
To begin, you’ll need to have Git installed on your machine. You can download the appropriate version for your operating system here. If you install Git for Windows, Git Bash will automatically be included. Git Bash is a command-line interface for working with Git, and will be how we input Git commands throughout our tutorial. If you are working on a Mac or Linux based machine, your terminal may be different. As such, some of the formatting Git Bash adds to the terminal may not be the same, but the steps and commands outlined in this tutorial will be.
Please note: The machines used for the tutorial and screenshots are operating on a Widows 10, 64-bit system. The initial installation may vary for your OS, but the commands for using Git will be the same.
Part One: Setting Up the Project
Creating a Repository
When working on a project with Git, you will create a repository. A repository is a named .git that tracks the changes to a project over time. It lives in the project’s root directory. There are a number of ways to create a repository, but for the purposes of this tutorial, we’ll create one in Bitbucket. Bitbucket is a repository hosting and management site designed to support Git.
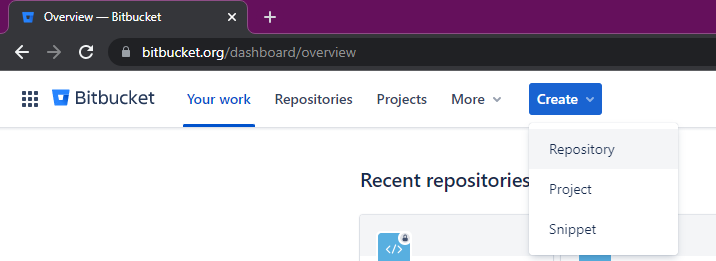
Once you have signed into, or created an account for, Bitbucket, you will be able to click the ‘Create’ button in the top bar. A dropdown menu will appear. To begin, select ‘Repository’.
Next, you will be presented with a number of options for creating your repository. Do not name your repository anything with spaces, as this will make inputting Git commands more complicated later on.
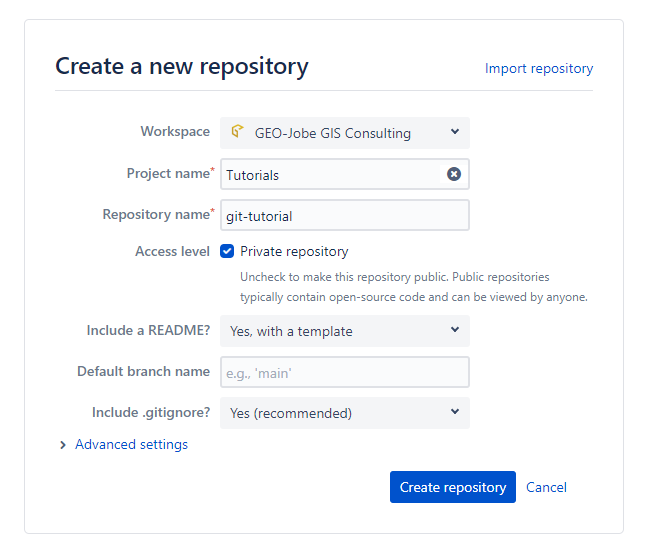
After you input your desired project and repository name, click ‘Create repository’ and, viola! You’ve created your first repository.
Cloning a Repository
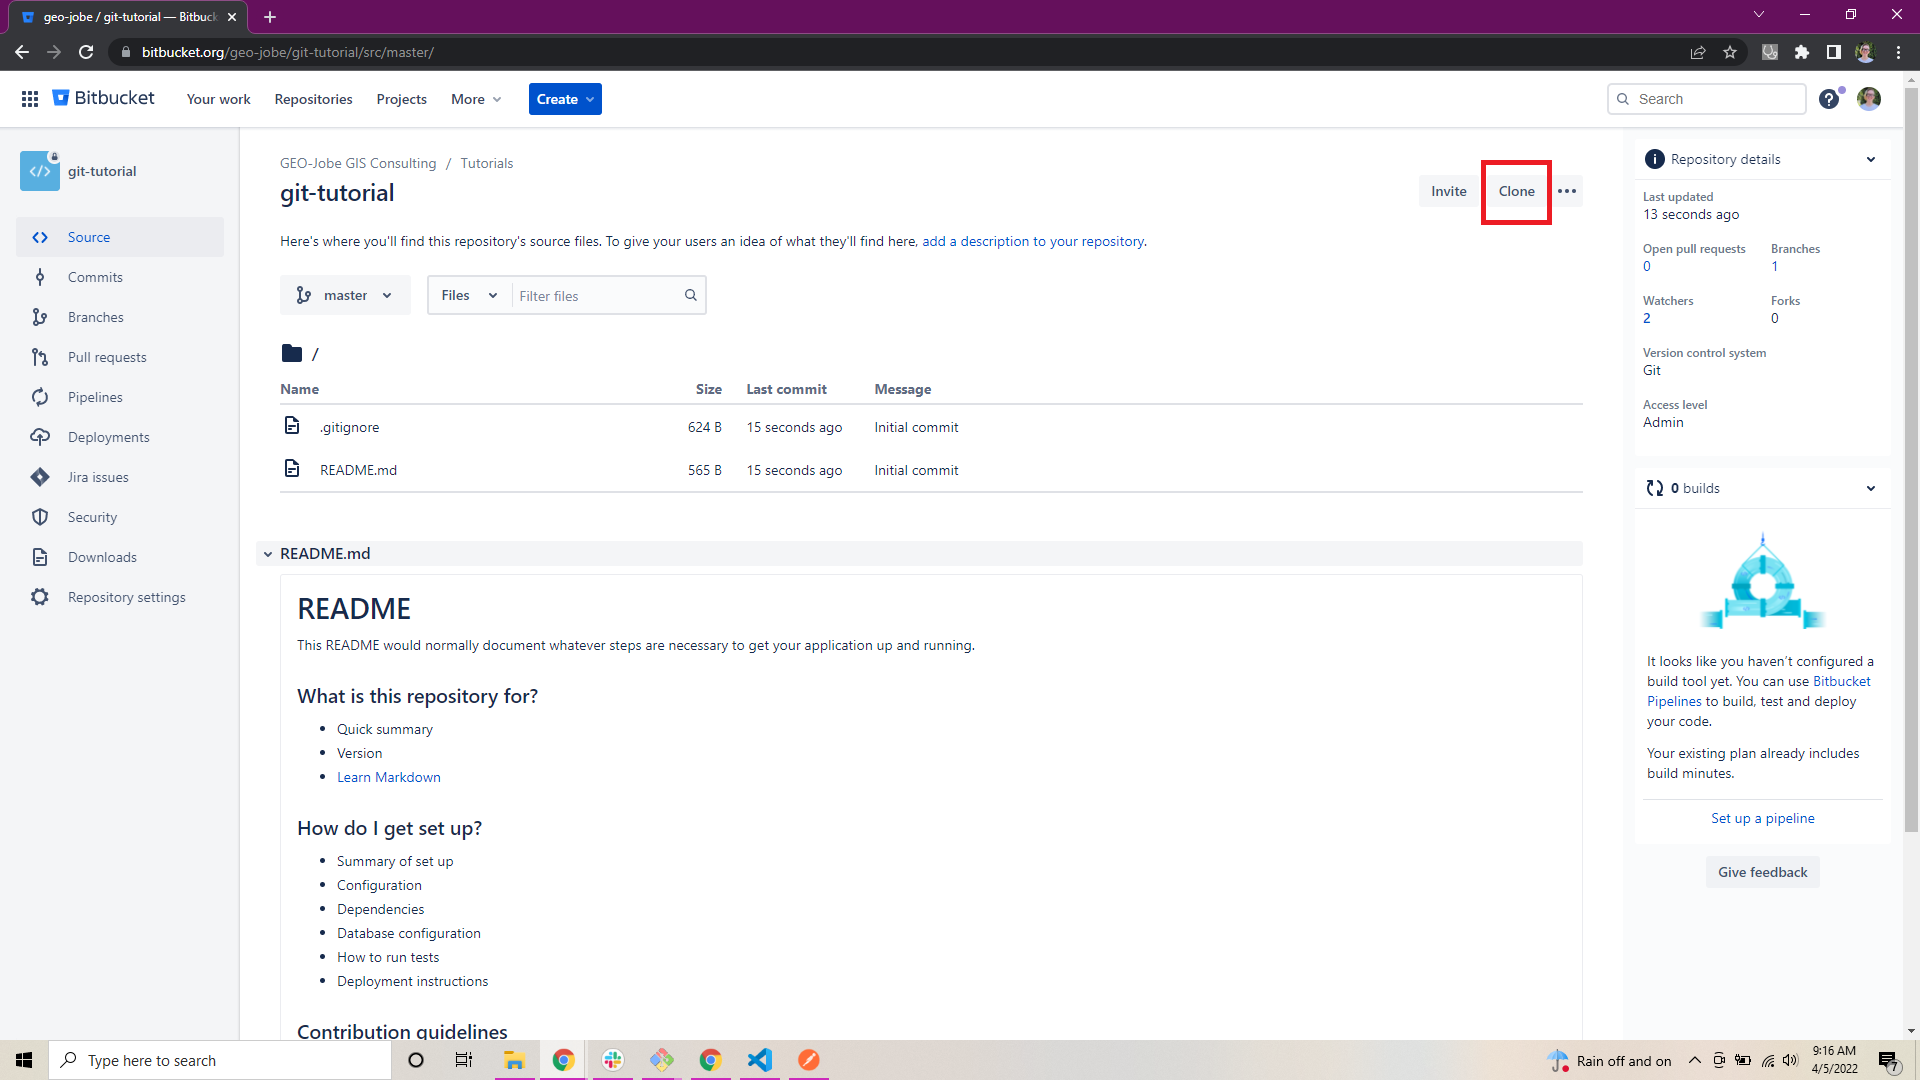
Once you’ve created your repository, you’ll need to clone it to your local machine in order to work on it. ‘Cloning’ a repository means copying it to a new machine. This copy has the same history and versions as the machine you are copying it from. It also maintains a record of the ‘origin’ machine where the repository was originally created. To begin, click on the ‘Clone’ button in the repository.
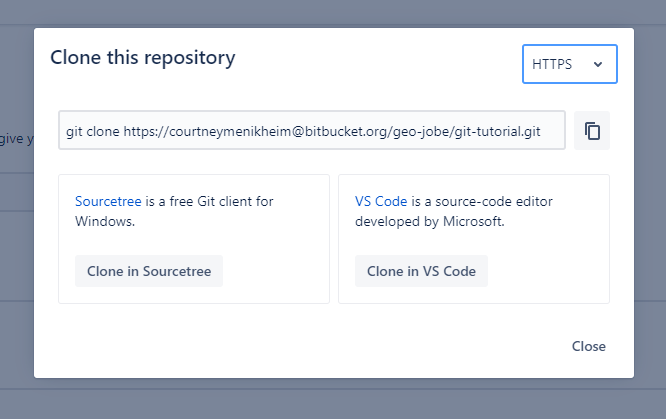
After clicking this button, a modal will appear. It will contain the required text for cloning the repository in Git. Copy the text to use in a moment. It should include the command git clone and a url for the repository. The ‘git’ part of the command will tell the terminal it is receiving instructions for the Git repository. The ‘clone’ part says “copy the repository at the url I’m about to provide to this machine”.
Next, open Git Bash in the folder where you will create your project. In our case, we are cloning the repository to the folder we use for local development with WampServer. This is because our tutorial project will be a basic web page.
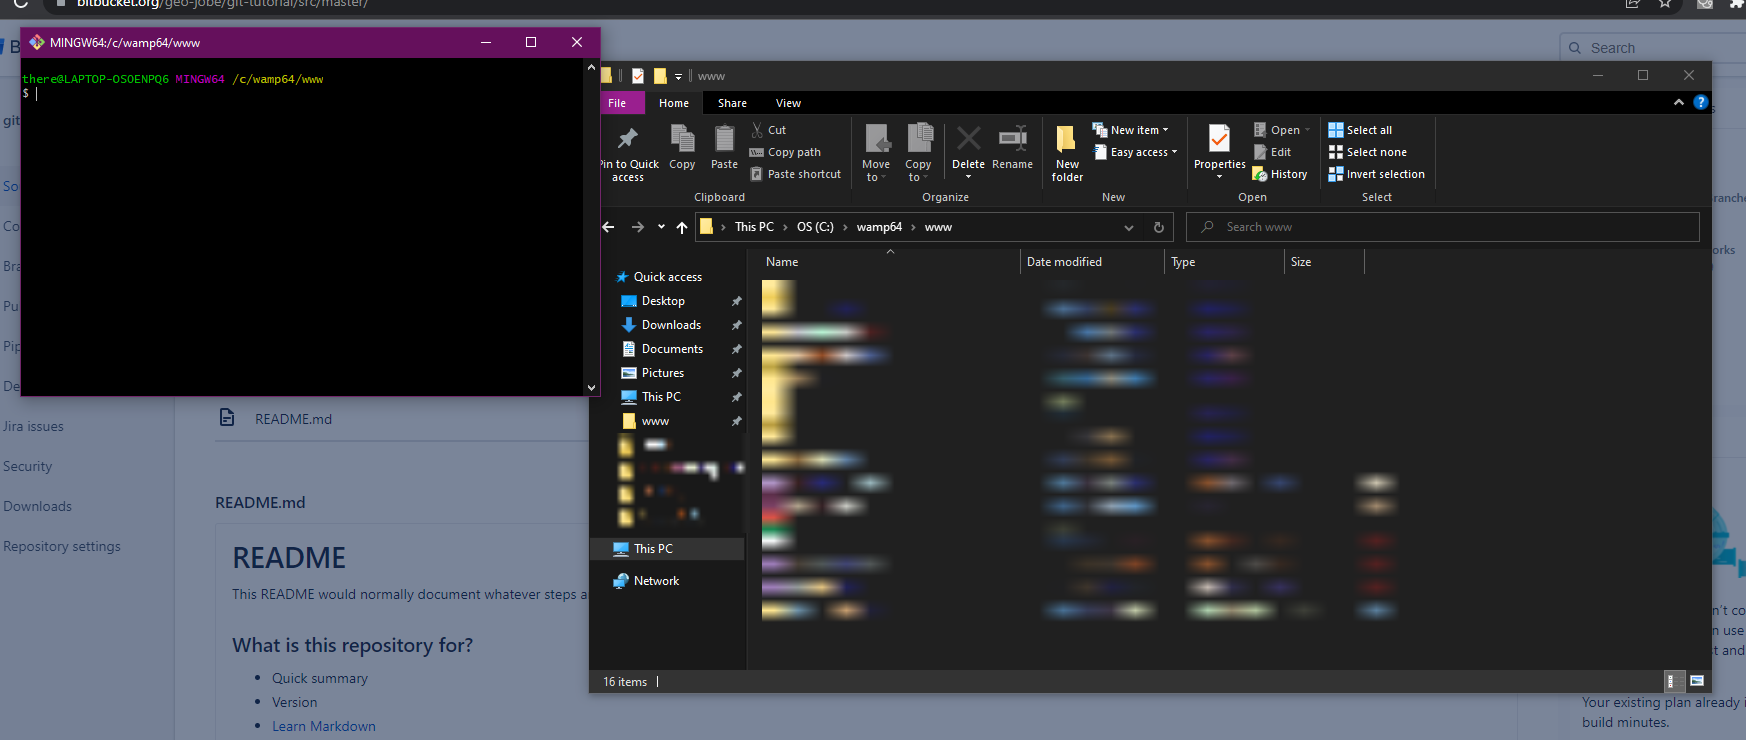
In the Git Bash terminal, paste the command for cloning the repository that you copied earlier. After inputting the command, press the ‘Enter’ key (or its equivalent) to execute it. After the project is cloned, you should see a new folder with the same name as the repository in your local file system.
If you open the folder, you will see the README file (if you chose to create one). If you have viewing hidden files enabled on your machine, you will be able to see a .git folder and .gitignore file. The .git folder contains all the information for your repository. You should never need to open it or interact with its contents, as Git Bash (or your version control interface of choice) will manage it for you.
If you update your Git Bash to look at the directory for your project, you will see some blue text in parenthesis after the directory location. (By default, this text will say ‘master’, unless you named your primary branch something different when creating your repository). This indicates that you are in a folder that is part of a Git repository, and that you are on the master branch.

Congratulations! You have cloned your first repository and are now ready to get to work.
Part Two: Git Basics
Configuring the User
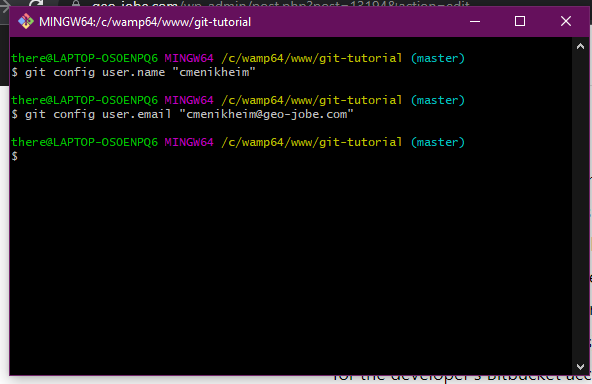
When working with Git, you will need a way to identify which user is making changes. This helps know who to ask if there are questions about a change in the future, as well as aiding in accountability. When you first set up a project, you will need some details to identify the user. This information will be set with two very similar commands. To set the name of the user, enter the command git config user.name, followed by the name of the user, enclosed in quotes. Similarly, git config user.email will set the user’s e-mail address, enclosed in quotes. Both the username and email address should match the information for the developer’s Bitbucket account.
Once you have your user configured, you’re ready to get to work!
Making Your First Commit
You’ve cloned your repo. You’ve made a feature branch. You’ve written the code and added the assets you need to make the feature work. Now, how do you get your changes back into the repository? Making a commit is the process of saving a snapshot of the project at a particular point in time. If a developer ever needs to see who made a change, when it was made, or revert to a previous change, they’ll need to reference the commit where the change happened.
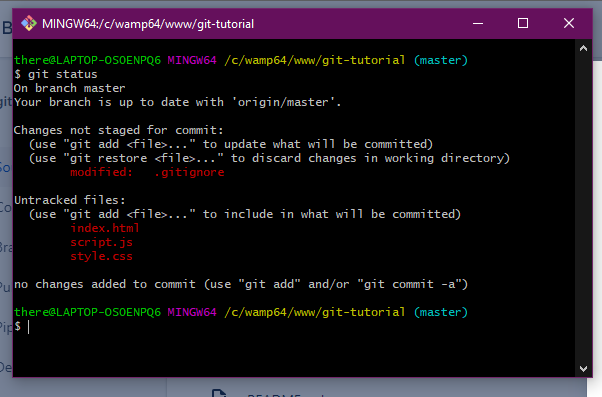
The first step in making a commit is to move your new or edited files to the staging area. (They are currently in what is referred to as the working area). You can see which files need to be staged by typing the command git status into your terminal. Any files you have added or edited that have not been staged will appear in red text. As an example, we have edited the .gitignore file in our repository to exclude files specific to running our IDE and added some new files with the basic framework for a webpage.
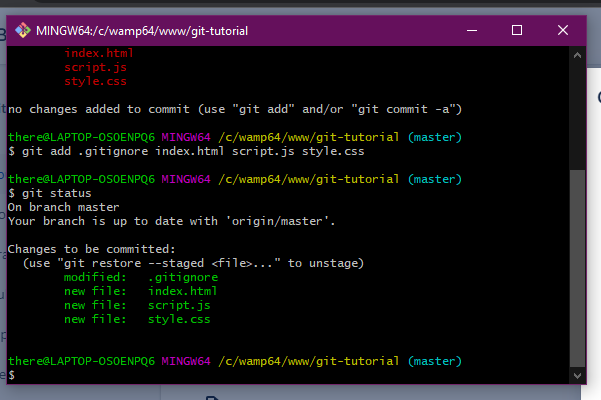
To add a file to the staging area for a commit, enter the command git add, followed by the file(s) you wish to add. If you add the name of a folder, all of the contents in that folder will be added. Additionally, you may enter git add *, but be careful when doing so. This command will add ALL of the unstaged changes – every folder, subfolder, and file. It is easy to add something you didn’t mean to when using the asterisk. Once you have staged the files with changes you want to keep, you can run git status again. If you do, the staged files will appear in green text. These are the files that will be included in the commit made.
The next step is to make the commit itself. The command for this is git commit -m, followed by a brief message in quotation marks. The commit message should give some indication as to what was changed in the commit. Many organizations and teams have additional standards for what should be contained in a commit message or how they should be formatted, so check with any appropriate parties when working as part of a group.
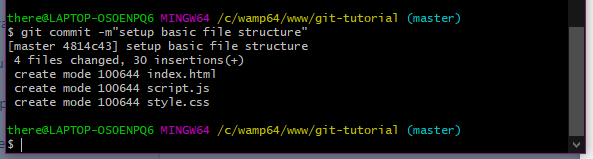
After making your commit, you can run git status again. If you do, you’ll see the files you were using are no longer in the working or staging area. You’ll also see a messaging indicating that your local branch is ahead of the origin.
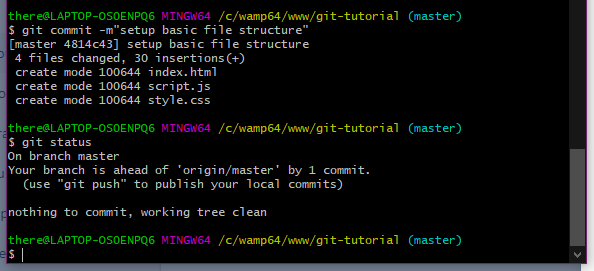
In order to get your commit from your machine back to the origin (where everyone else can access it too), you’ll need to push your commit.
Pushing a Commit
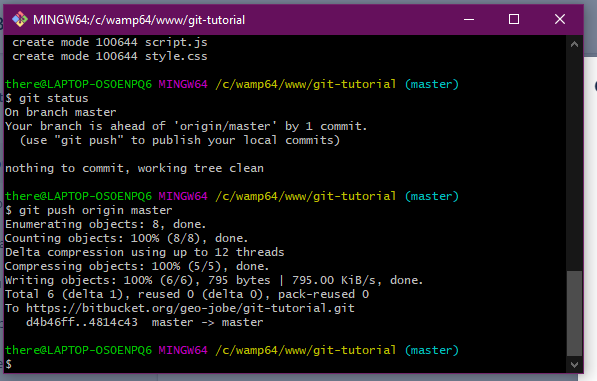
Pushing a commit means sending it to another computer. Usually, a developer will push a commit from their local machine back to the ‘origin’. The origin is usually a centrally accessible computer that multiple developers can interact with. In this case, the origin is the Bitbucket server. By pushing your commit, you’re making it easier for your collaborators to access your work.
When using Git, you will push a commit by entering the command git push, followed by the name of the machine (in this case, ‘origin’) and the branch (in this case, ‘master’ – we’ll get into branches in a moment) you are pushing to. Depending on the size of the commit and the speed of your internet connection, there may be a pause between when you enter the command and when the terminal displays a message.
Branches
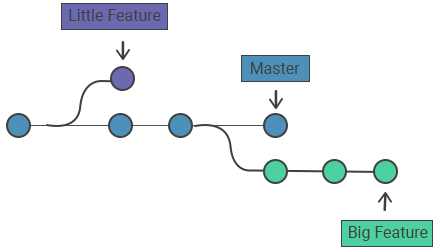
One of the most useful features of working with version control systems is the ability to create multiple branches. In version control, a branch allows someone to split off a copy of the code base and make changes to it, while still keeping the original code base in tact. Commonly, developers will create a new branch for each feature on a project. This will allow developers to make changes to the project related to the feature they are working on, without interrupting each others’ work.
Branch names should simply state what the branch is working on. They also should not contain any spaces. You may want to keep the name as concise as possible, as you will be typing it several times while working on the branch. Check with your organization / team to see if there are any additional naming conventions to consider.
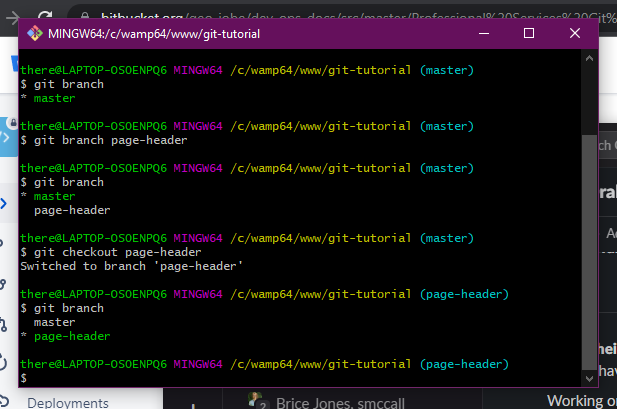
There are a few important commands when it comes to creating and interacting with branches. To view the branches on a project, type git branch into your Git Bash terminal. When you do so, a list of the branches for the repository will appear. Whichever repository is green with an asterisks (*) next to it is the branch you are currently on. For creating a new branch in Git Bash, type the command git branch and the name of your desired branch. Switching between branches can be done by typing git checkout and the name of the branch. If you want to create a branch and immediately switch to it, you can type git checkout -b and the name of the new branch.
Working with branches is a very common practice in Git. It makes trying things out and keeping track of changes much simpler. If you know you want to keep what’s in a branch, you can just merge it back into the master branch when you know everything is stable.
Pulling a Commit
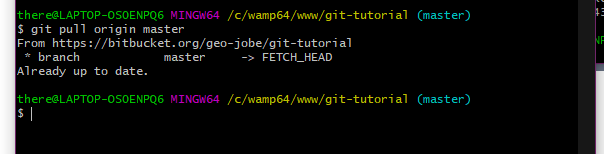
While pushing a commit gets code from your machine to another, a pull is how you request an updated copy of the repository be sent to you for local use. It’s how you get the work from other developers onto your machine. The command for pulling changes down to your local machine is git pull. Like the command for a push, you will need to specify the machine (‘origin’) and branch (‘master’) you are pulling from.
If everything goes well with a commit, you can continue on with your work. However, there are times where things don’t go quite as smoothly…
Basic Merging
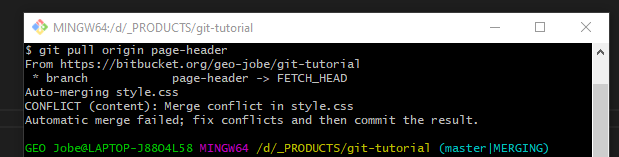
When two developers edit the same part of the code, Git can’t tell which one is the right one to keep. When this happens, it’s called a merge conflict. It is especially common when a team is merging two branches together (that is, including all the changes from one branch into another). When you make a pull request and there is a merge conflict, Git Bash will say the merge failed, tell you what file the conflict is in, and display “| MERGING” next to the branch name when displaying the active directory.
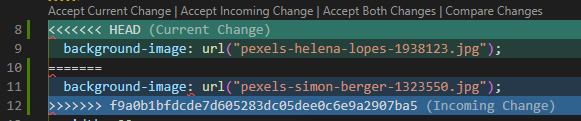
To resolve it, you will need to manually merge the code. Open the file where the merge conflict occurred. Depending on your development environment, the merge conflict may already be highlighted for you. Look at the conflict and determine which of the two merges you’d like to keep. In some cases, you may want to keep a combination of the merges. In that case, you may have to move some code around in the file or write a few new lines to support the merge.
Once you’ve merged the branches (and tested your fix), you can commit the new changes. Pushing the resolution back to the origin machine will help other developers avoid the same merge conflict in the future. Merge conflicts are an inherit part of working with Git, so don’t be alarmed when you encounter one. Take your time, look at what’s going on, and you’ll be able to resolve it in no time!
Part Three: What’s Next?
Thanks for tuning in for this part of our blog series on Git. In the future, we plan to cover more Git commands, special VS code tools for working with Git, and what to do when dealing with more complex merge conflicts. If you have anything you’d like to know about Git or version control, let us know and we’ll try to cover it. If you need some help setting up a version control system for your team, reach out to us about a Professional Services engagement.
Shout out to Brice Jones for co-authoring this tutorial with me.
GIT Series
- Version Control Could Save Your Life
- Are You Using the Right Type of Version Control System?
- More to come!