

ArcGIS Field Maps is a powerful application within the Esri ecosystem that helps streamline workflows for data capture and asset monitoring out in the field. Multiple use cases for field maps have been utilized, from mapping sightings of invasive species to tracking damage to homes after storms. One of the most common use cases is for asset inventory, which includes adding locations of existing assets and related information. The information related to the assets can include GPS coordinates, notes on condition, pictures, and serial numbers. Sometimes, the attributes related to the asset can have more than one input, such as customer information.
Just recently, GEO Jobe came upon this when working on a project for a client. The client was working on mapping the location of gas tanks and attaching associated information. It is pertinent to know which tank serves which customer in case of an emergency. Some tanks only serve one customer, but other tanks serve multiple. Due to having multiple addresses to one gas tank, a related table had to be created for the customer addresses that could be “viewed” and attached to the main tank layer. This requires a one-to-many relationship, but how do we go about setting up a relationship that can be viewed and edited in field maps?
In ArcGIS Pro
Create the data
The functionality to create a relation between a standalone table and feature layer does not exist in ArcGIS Online (AGOL) or Portal yet. Therefore, ArcGIS Pro must be used to create the relationship class. I am going to walk through the process using a scenario of adding customer information through field maps that are tied to a gas tank layer. The customer information is stored in a standalone table. The tanks are in a feature class. Everything is stored in the same geodatabase.
Create geodatabase
First, a project geodatabase was created. Then, I created a point feature class for the Tank Layer and a stand-alone table for the customer addresses and added them to the geodatabase. The following are the fields used in the customer address stand-alone table.
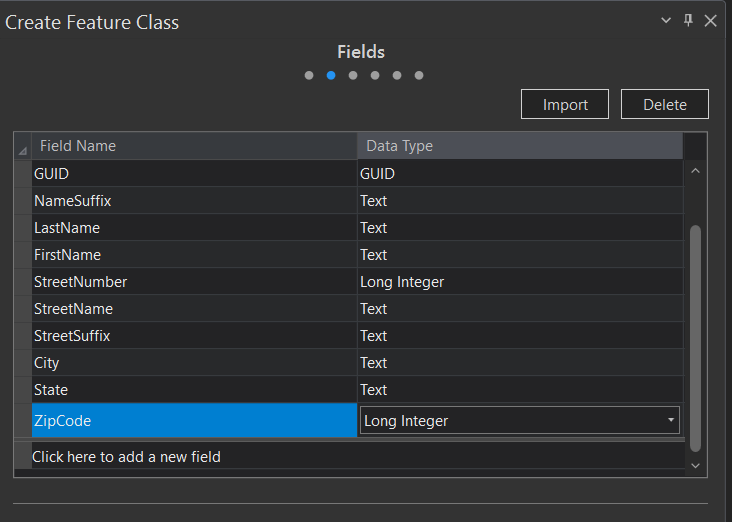
Your fields and field types may look different depending on the layer and your needs. I decided to create the fields this way to help with data consistency. To understand the importance of having a good schema, please read this blog post – “Stop Sabotaging by Not Standardizing Your Data.”
How to create a link between the Tank Layer and Customer Address
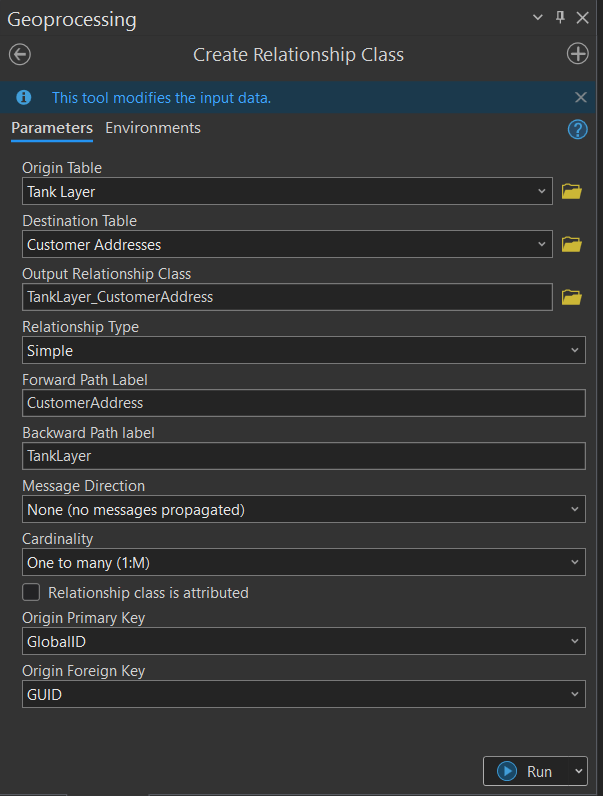
*Before proceeding, the origin table (for this project, the tank layer) must have a global ID field and the destination table (for this project, customer address) must have GUID. You can add a globalID using the Add Global ID tool and add the GUID in the Add Fields tool.
Next, it is time to create a relationship between the tank feature class and customers’ addresses. This is done through the Create Relationship Class tool. The following screenshot shows how to set the relationship up in the tool. After running the tool, make sure the relationship shows up in the geodatabase.
Publish the Data Online
The next step was to publish the feature class and table to AGOL. I went to the banner at the top and selected “Share as Web Layer.” I analyzed the data to make sure there were no issues and fixed any that were noted. Once finished, I was ready to publish!
If you need any further tutorial on the previous steps, here is a video (Designing Related Records in ArcGIS Pro for use in ArcGIS Online) by Esri Ireland that goes over designing related records, but uses a different dataset.
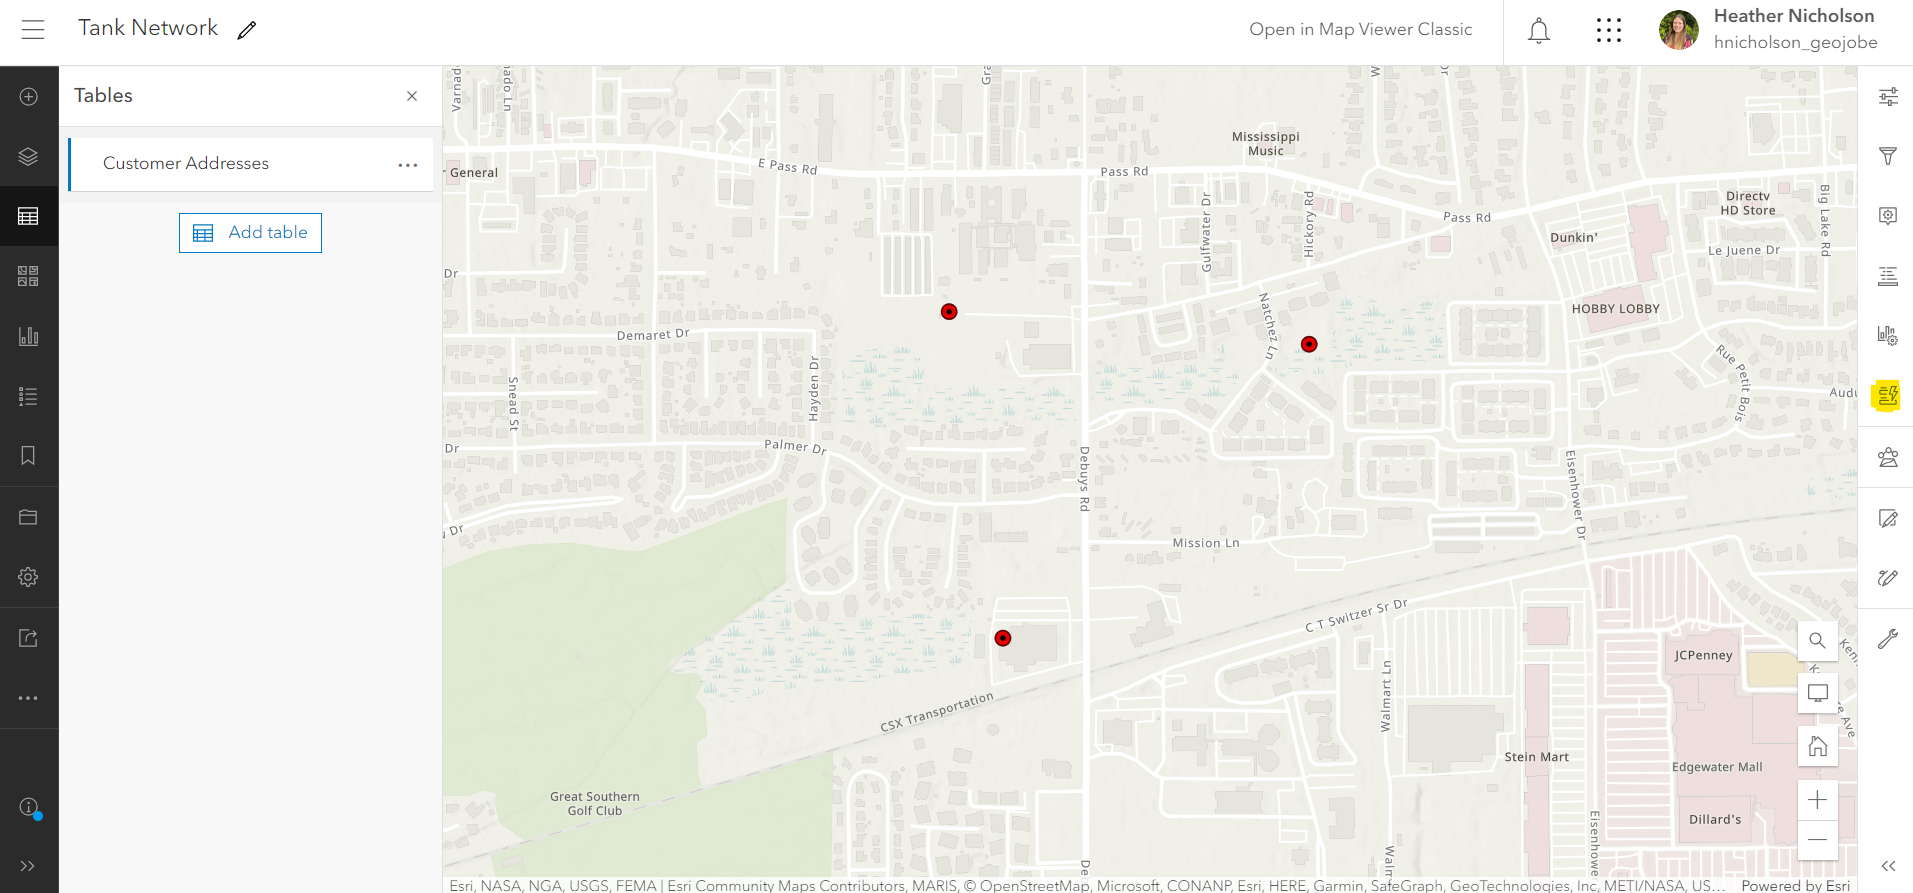
In ArcGIS Online
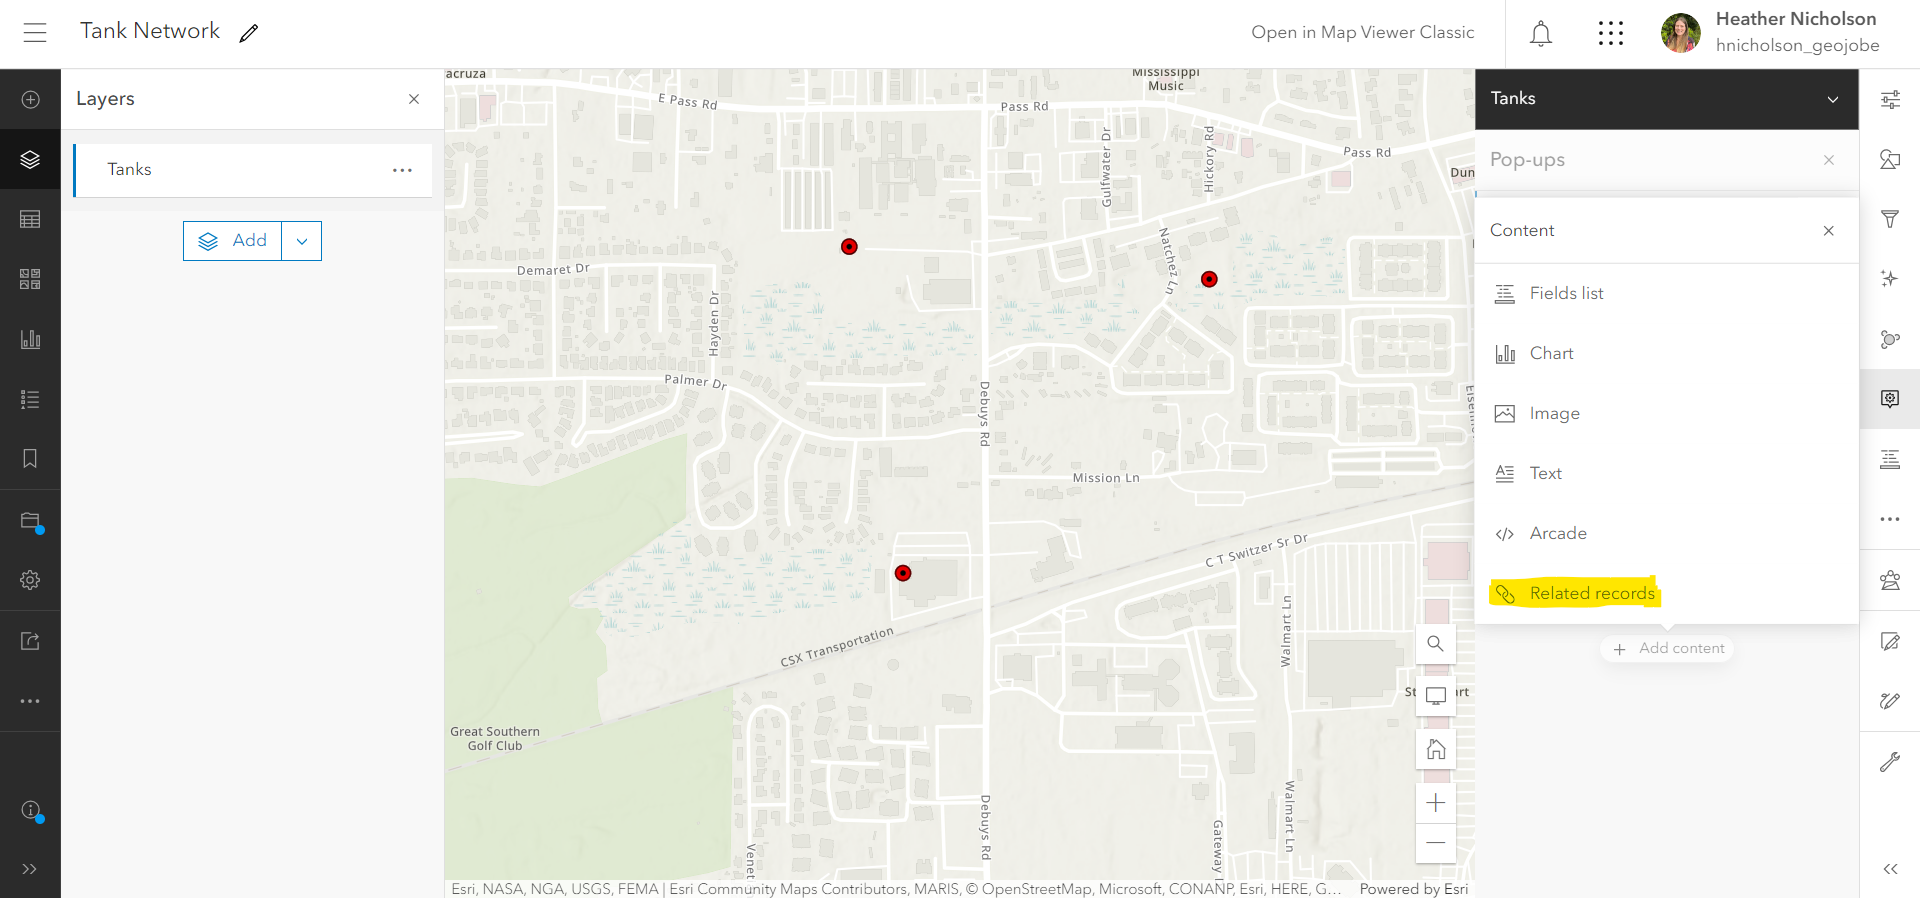
Once the data was in AGOL, I created a separate web map that contained the tank layer and customer addresses table. From there, I added a pop-up to the tank layer. I formatted the pop-up to include a title and fields I wanted. Lastly, I clicked on add content and selected the related records.
Before creating the forum in field map designer, I still had to take one more step and configure a form for the customer address. To do this, I went to the table pane on the left side of the screen and selected customer addresses. I then hit form builder on the right side of the screen and added the fields I wanted (and left out fields I did not want people to edit, such as GUID).
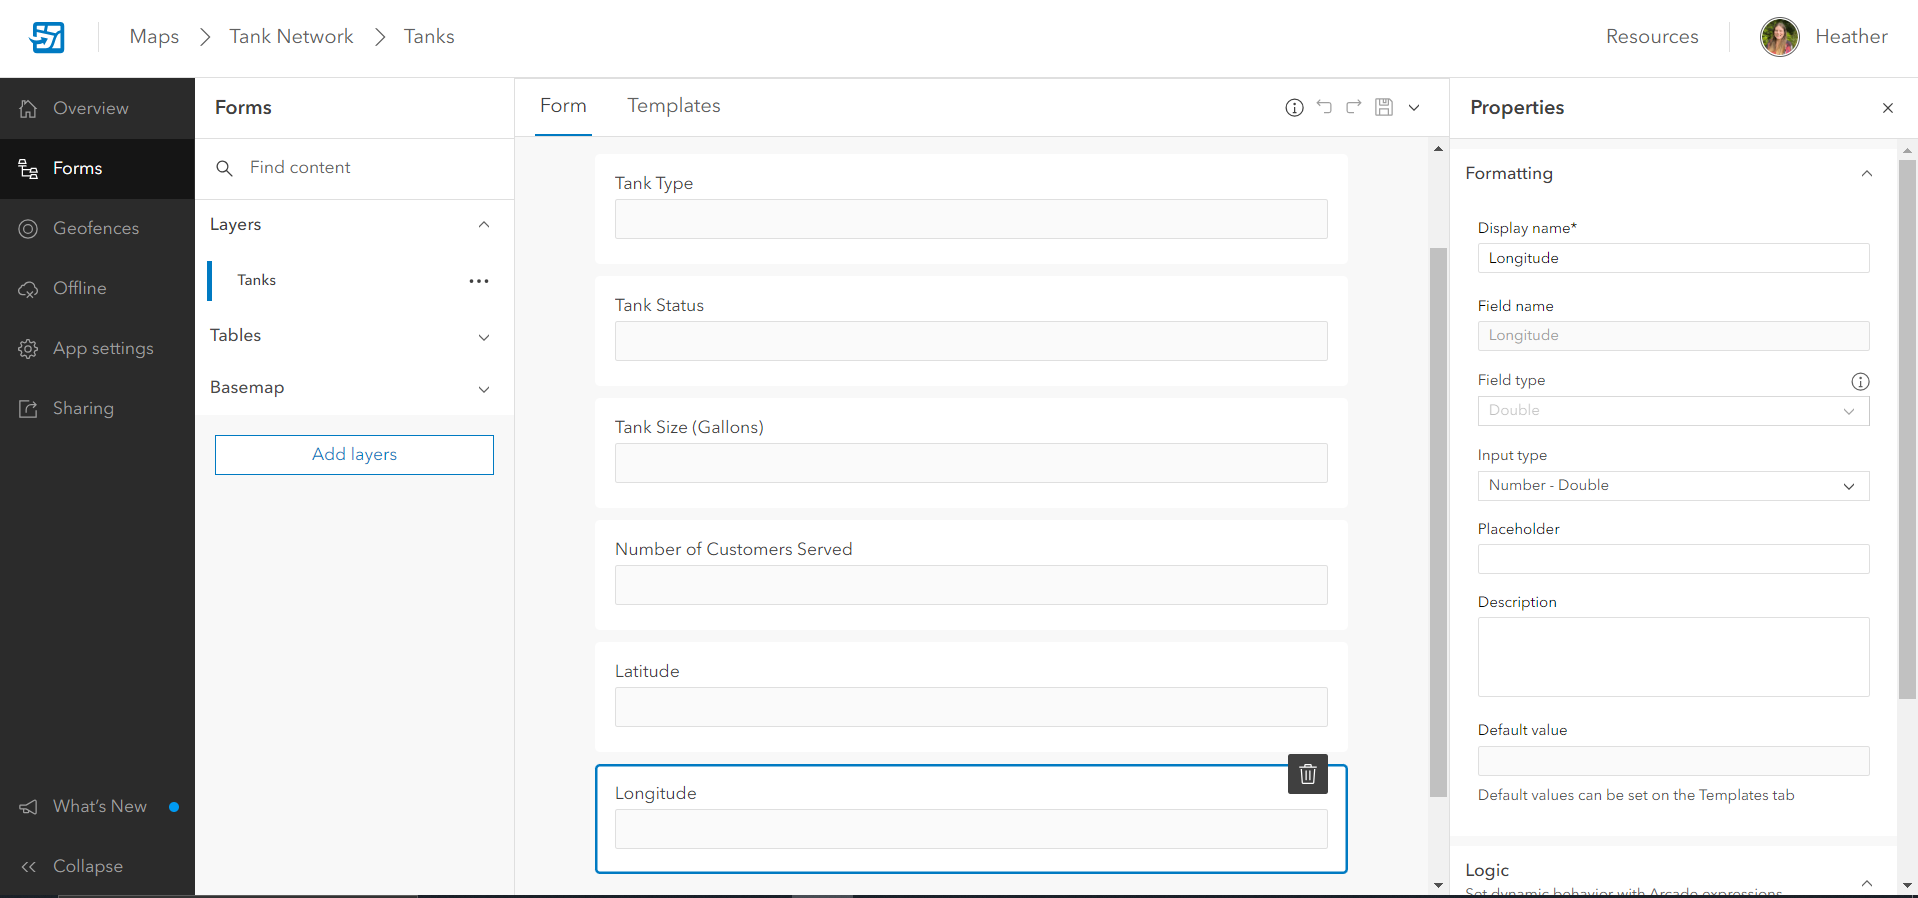
Configure the form in Field Maps Designer
Now I opened the Field Maps Designer and configured the form as I needed. However, I did not add the related table. The following is the forum that I configured for this.
Add the data in the Field Map Apps
Next, it was time to add the customer information to my table in the field maps. I opened the app on my phone. I went to the point I wanted to add customer information to and opened it.
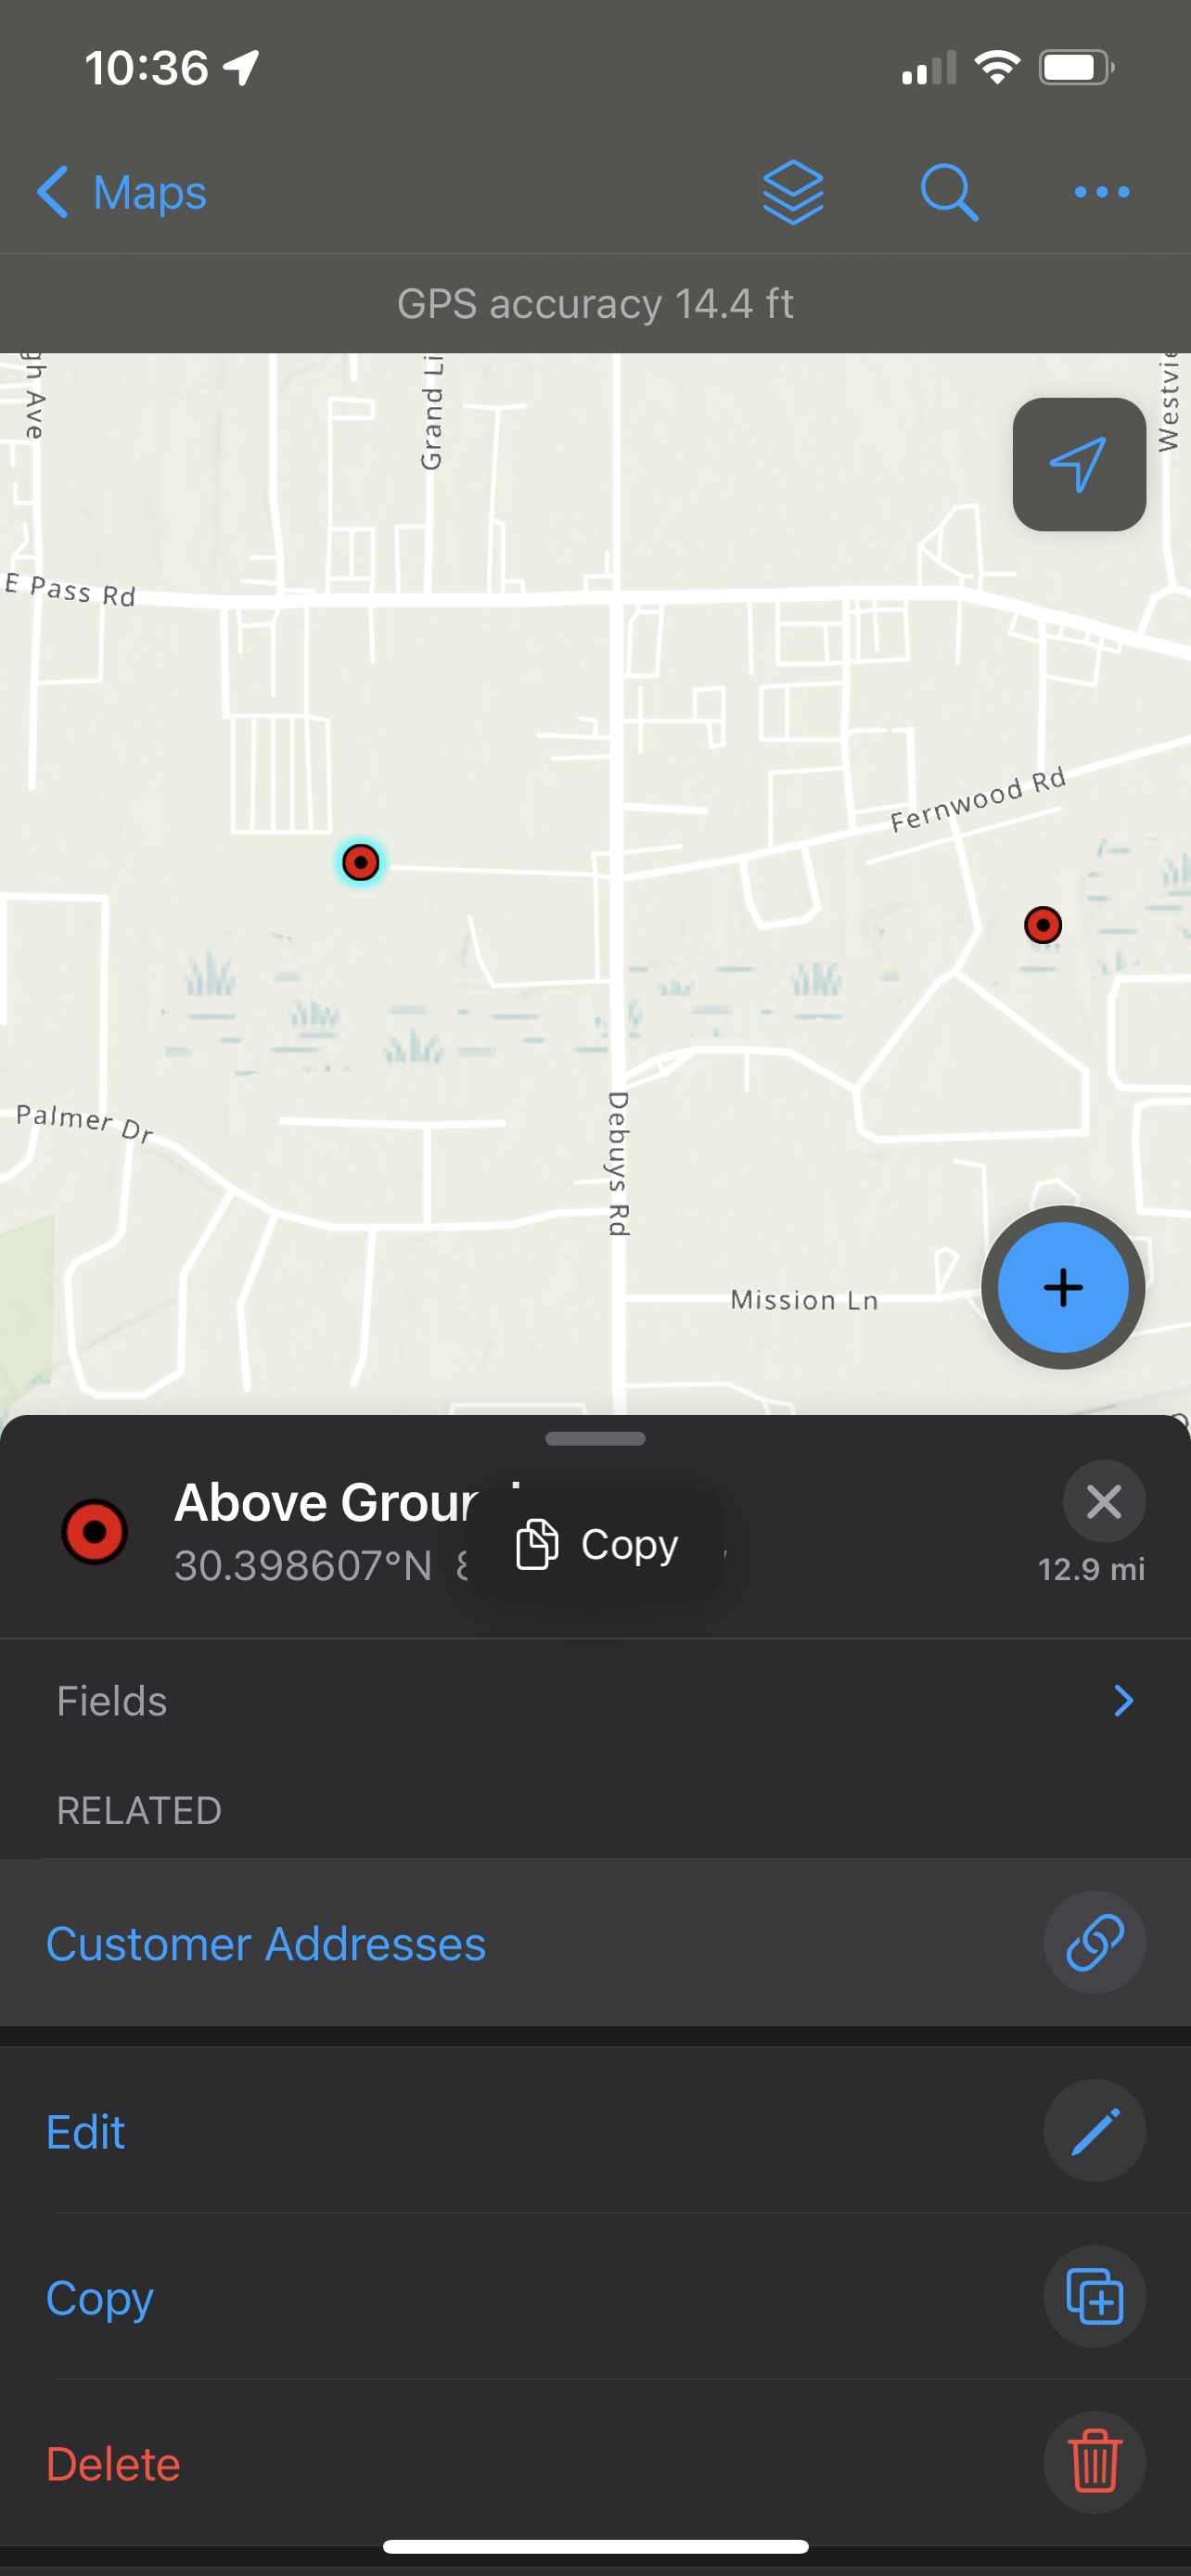
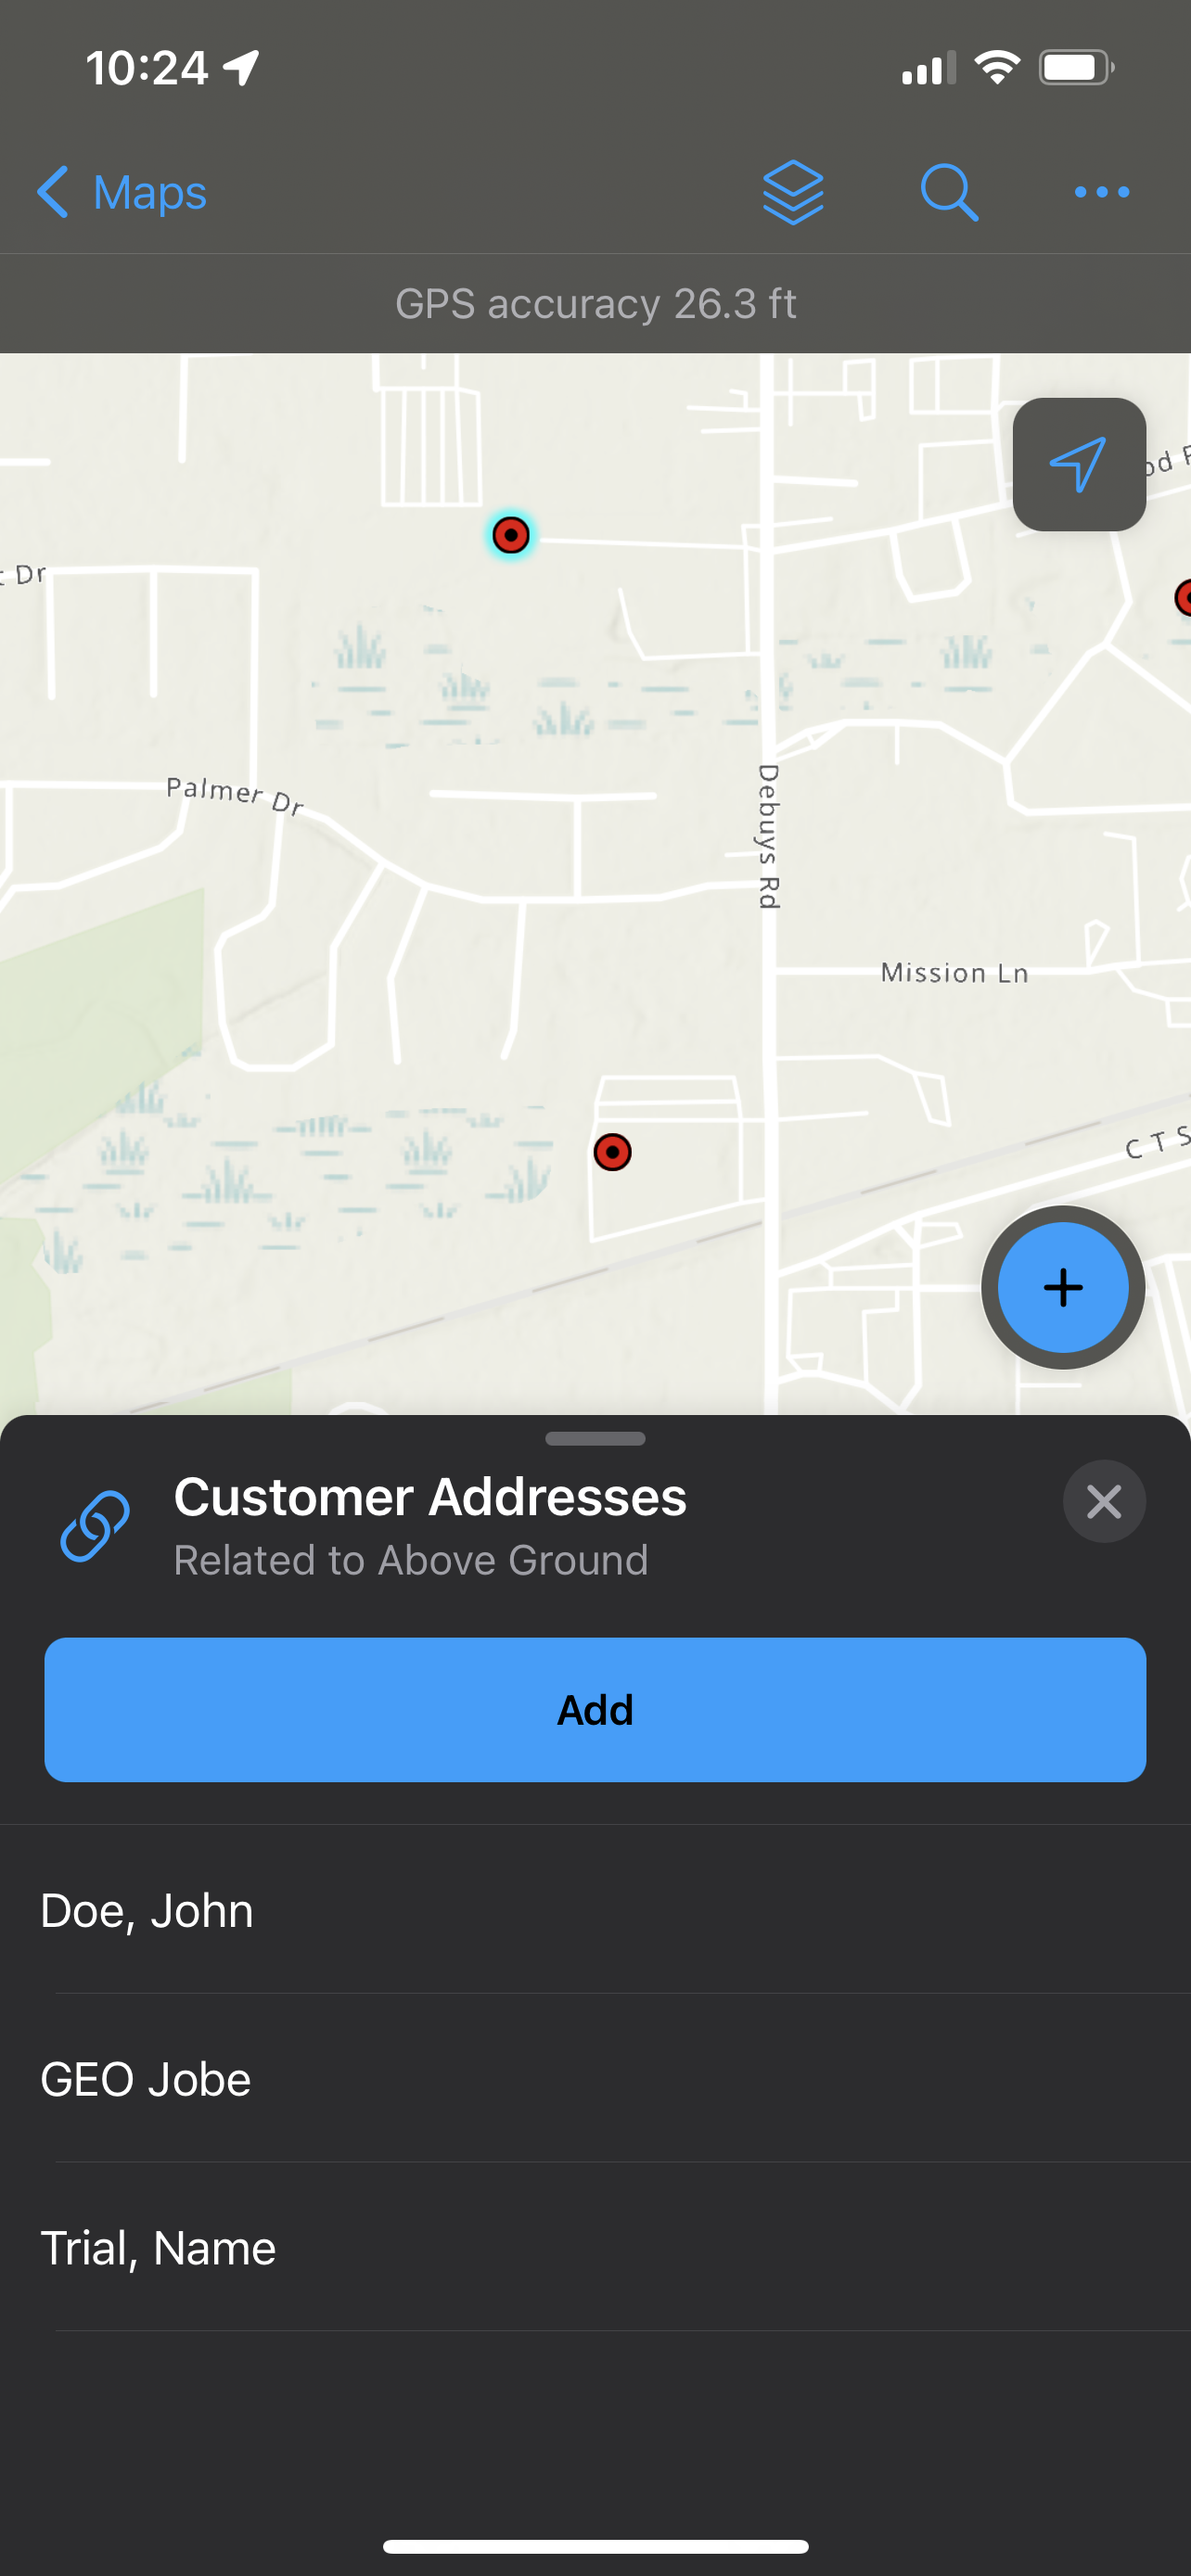
I first viewed current related records by clicking on it. I needed to add a new address, so I hit the add button and filled out the form and hit submit. I repeated this process until I was done adding all new addresses.
*side note: if you see No Title for the records you will need to configure the pop-up in the web map.
Once I was done adding the customer addresses for the first tank, I hit the X button to close out of the current feature and went to the next one.
A note about editing your related records in Web App Viewer
Recently, Esri released an update to the Map Viewer that allows you to edit related records within the viewer instead of having to either republish from Pro or go through field maps. Esri released a great walkthrough guide called “Introducing Related Record Editing in Map Viewer.” The steps to uploading the data as a hosted feature service are the same. However, one key difference in the workflow is that to be able to edit the related tables in the Map Viewer, you must configure the forms from within the Map Viewer, not Field Maps. Though you can have this workflow and the field map edit workflow set up in the same map–due to the way form editing for related records is currently set up, it may be best to have a web map for field app editing and a web map for in-office editing.
Our Services
I hope these steps have helped you set up your collection data. Do you have a workflow that is complex? Reach out to our team today for a free consultation via e-mail today! We would love to talk with you and make your life a little easier!
Want to read more on our series Get to Know Your Toolbox? Check out these!