


If you have read the previous articles in our series on Version Control and Git (Version Control Could Save Your Life, Are You Using the Right Type of Version Control System?, and GEO Jobe’s Guide to Getting Started with GIT), you should already be familiar with using Git in the command-line interface. Some people, myself included, prefer using a Graphical User Interface. For those people, I believe Visual Studio Code, also known as VS Code, has a lot of useful features. In the article ahead, I will show you how to use VS Code to clone a repository; commit changes; create or switch branches; merge branches; and a few other useful tips and tricks.
Cloning Your Repo
To use Git with VS Code, the first thing you need to do configure your user. In the previous article in this series, GEO Jobe’s Guide to Getting Started with GIT, Courtney described how to set up your Git user config for a specific project. You can also set the configuration so that it is the same across all projects your user interacts with on your machine by using the –global argument with the git config command. For setting the user name and e-mail globally, those commands would look like git config –global user.name “FIRST_NAME LAST_NAME” and git config –global user.email “MY_NAME@example.com”, respectively.
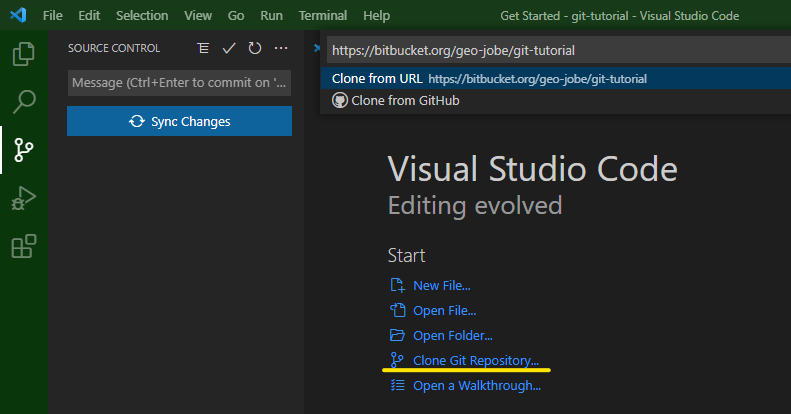
After your user configuration is set up, you are ready to clone a repository. First, select the ‘Clone Git Repository’ option from VS Code’s ‘Get Started’ page. This will make an input appear at the top of the window. Paste the url of the repository you want to clone into that input. Once you’ve selected ‘Clone from URL’, you’re ready to start writing code!
Creating and Switching Branches
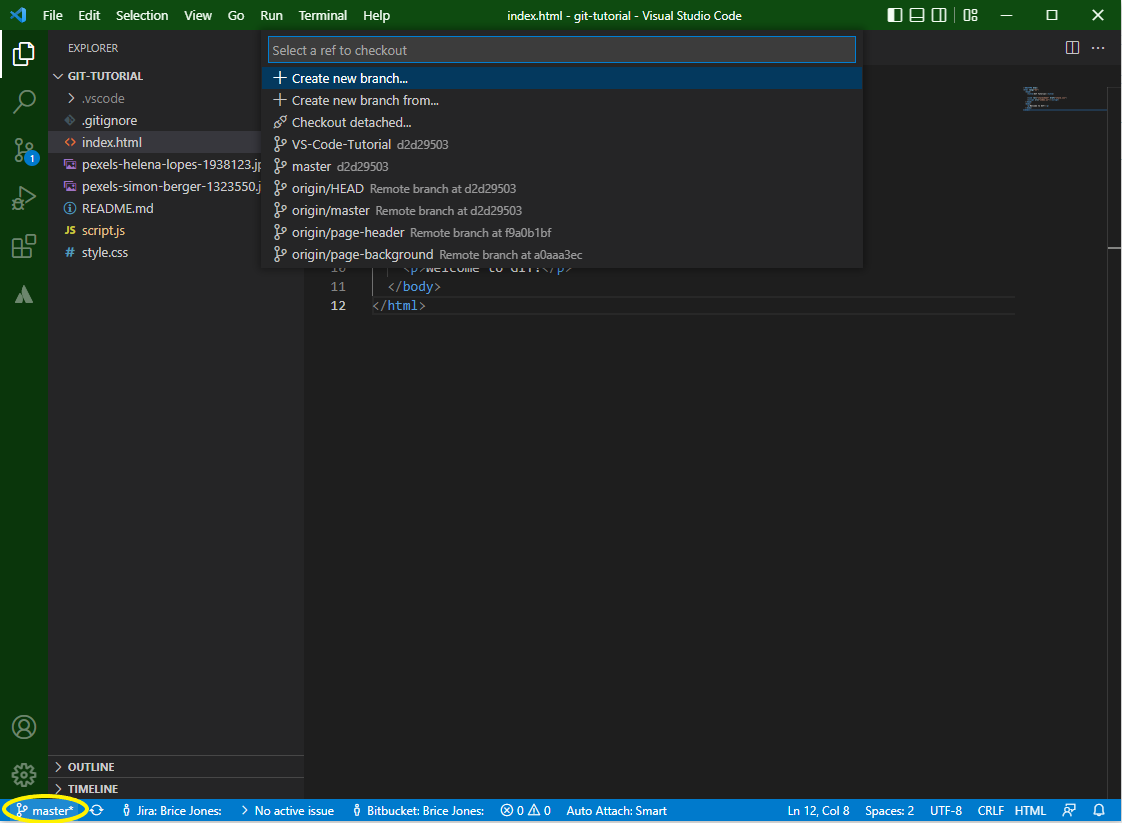
Working with branches is a crucial part of Git projects. Naturally, VS Code has options for checking out existing branches or creating new ones. To set branches, click on the current branch name in the bottom left corner of Visual Studio Code (the default branch on a newly pulled project is usually the ‘master’ branch). This will display a list of branches at the top of the VS Code window. From here, you can select a currently existing branch to switch to it. You can also select ‘Create new branch’ to make a new branch and immediately switch to it.
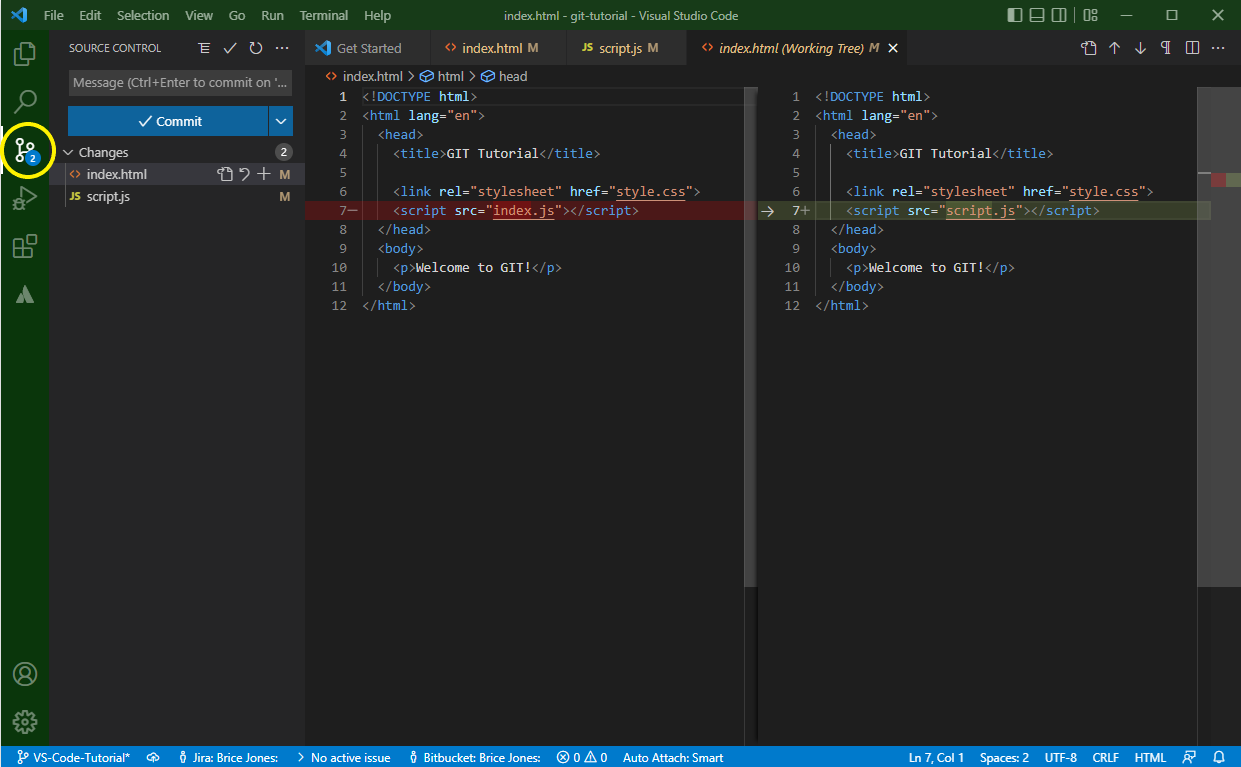
After you’ve switched to your desired branch and started making changes, you can view all changes made by selecting the third icon on the left toolbar in VS Code. This is the ‘Source Control’ option, and can also be reached by pressing Ctrl + Shift + G. You can view the differences between the last commit and the current file by selecting any file in the Source Control panel.
Making a Commit
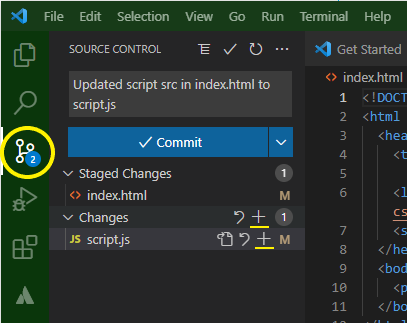
After you’ve written some code, you can stage your changes for a commit. To begin, select the Source Control panel on the left toolbar. In the Source Control side panel, you can add files to the staging area by pressing the + icon next to each edited (or newly created) file you want to add. If you want to stage all of the edited files, hover your cursor over the ‘Changes’ dropdown header. A new + icon will appear on the right side of the header; pressing it will add all of the displayed files to the staging area.
After you have staged all of the changes that you want to commit to your branch, type your commit message into the text input at the top of the Source Control panel. If you’d like to make your commit locally, but aren’t ready to push your changes, then press the ‘✓ Commit’ button. If you’d like to make your commit and immediately push your changes to the repository, then click the dropdown to the right of the Commit button, and select ‘Commit and Push’.
Merging Branches
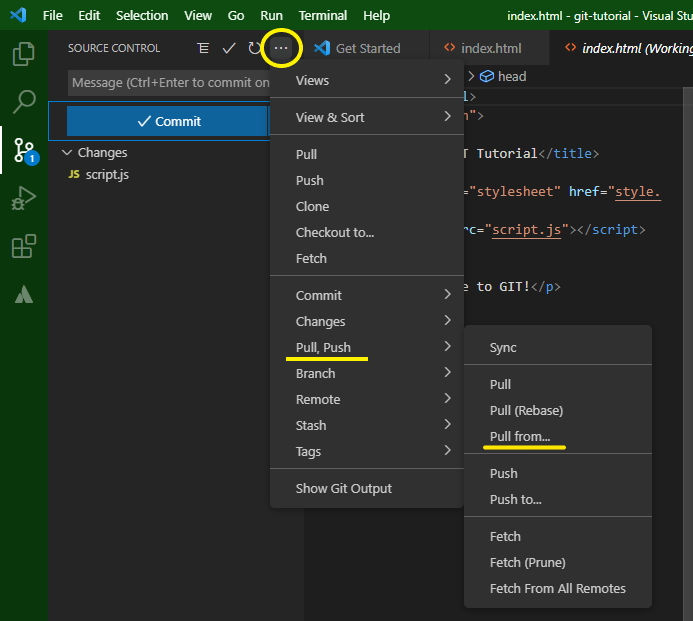
At the top right of the Source Control panel, there is a button with an ellipses (…). If you want to merge two branches together, you can just click this button, go to the ‘Pull, Push’ option, then select ‘Pull from…’ and select a branch to merge with.
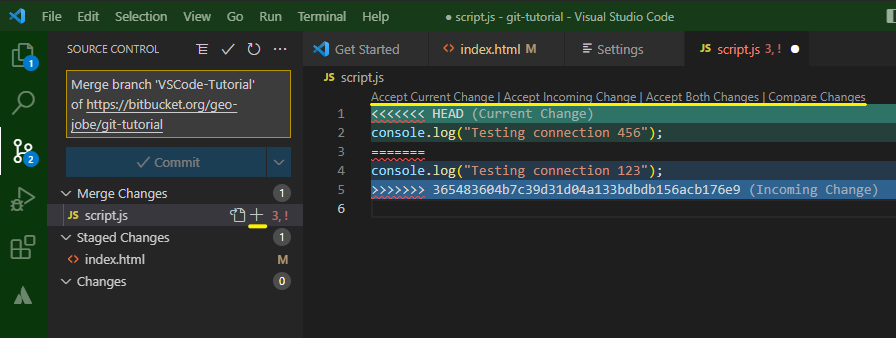
After pulling in updates from a branch, any merge conflicts will show up under the ‘Merge Changes’ section of the Source Control panel. For each conflict, you can either accept the current change (what’s on your local machine), incoming change (updates from the branch you pulled), or both. Once you have fixed all merge conflicts, add those files to the staging area (as described above), and commit your merge.
Other useful features
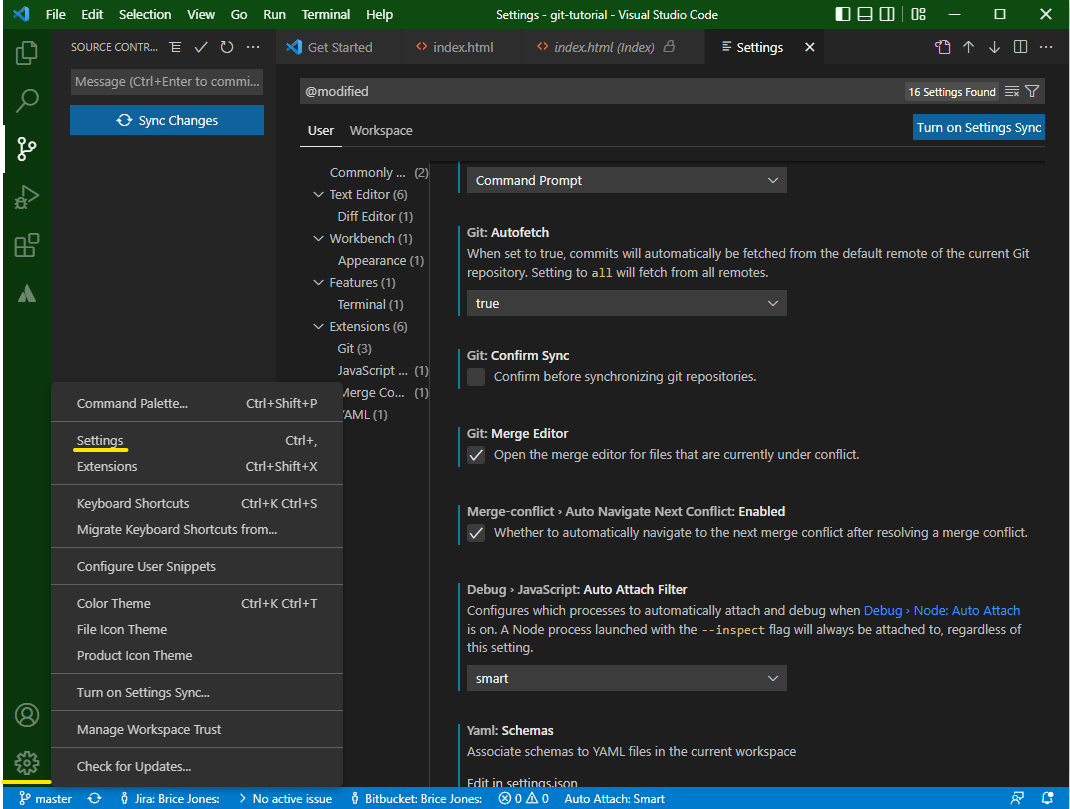
Now that I’ve shown you the basics of how to use Git in VS Code, I’d like to highlight a few more features that I’ve found very useful during my time as a developer. The first few need to be turned on in the settings menu, which can be found by clicking the gear at the bottom left corner of the VS Code window, then selecting the settings option. Starting from the top, Git: Autofetch periodically runs the git fetch command in order to keep your local repo up to date with the remote repo.
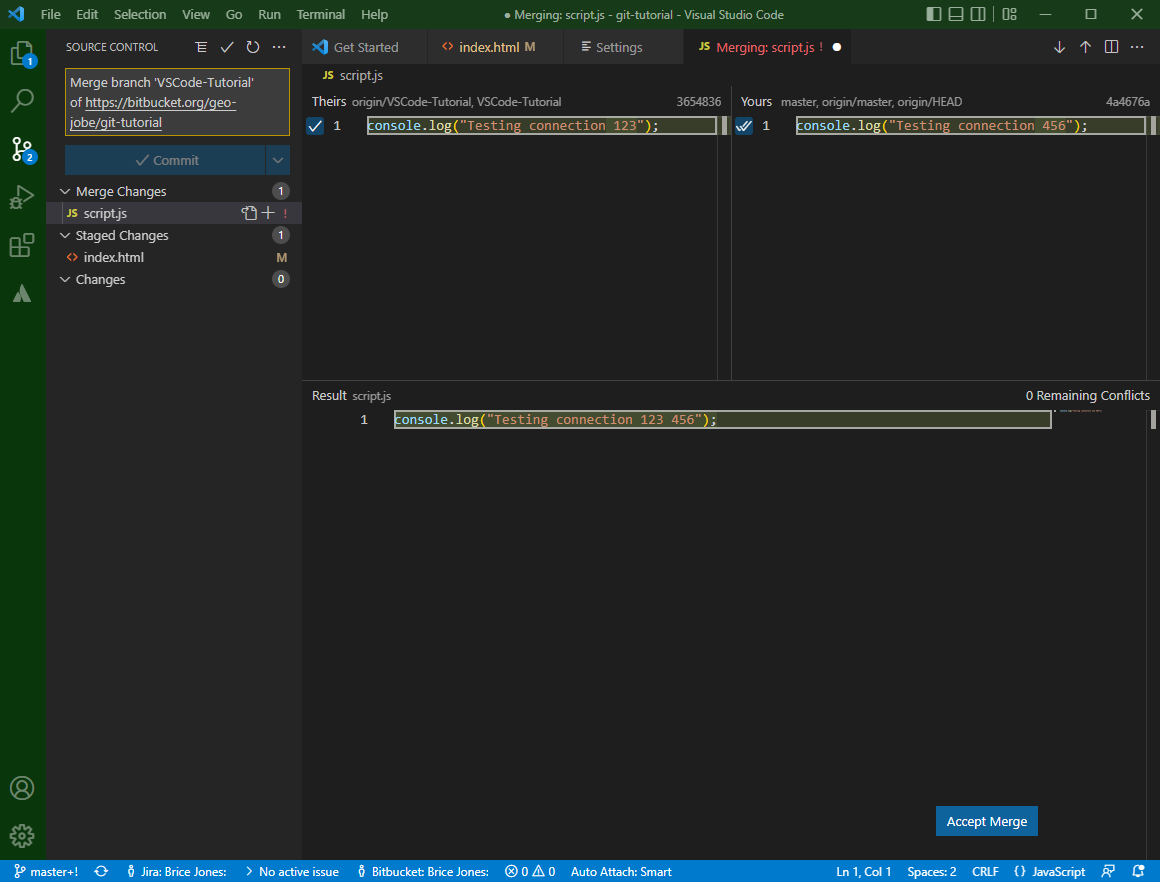
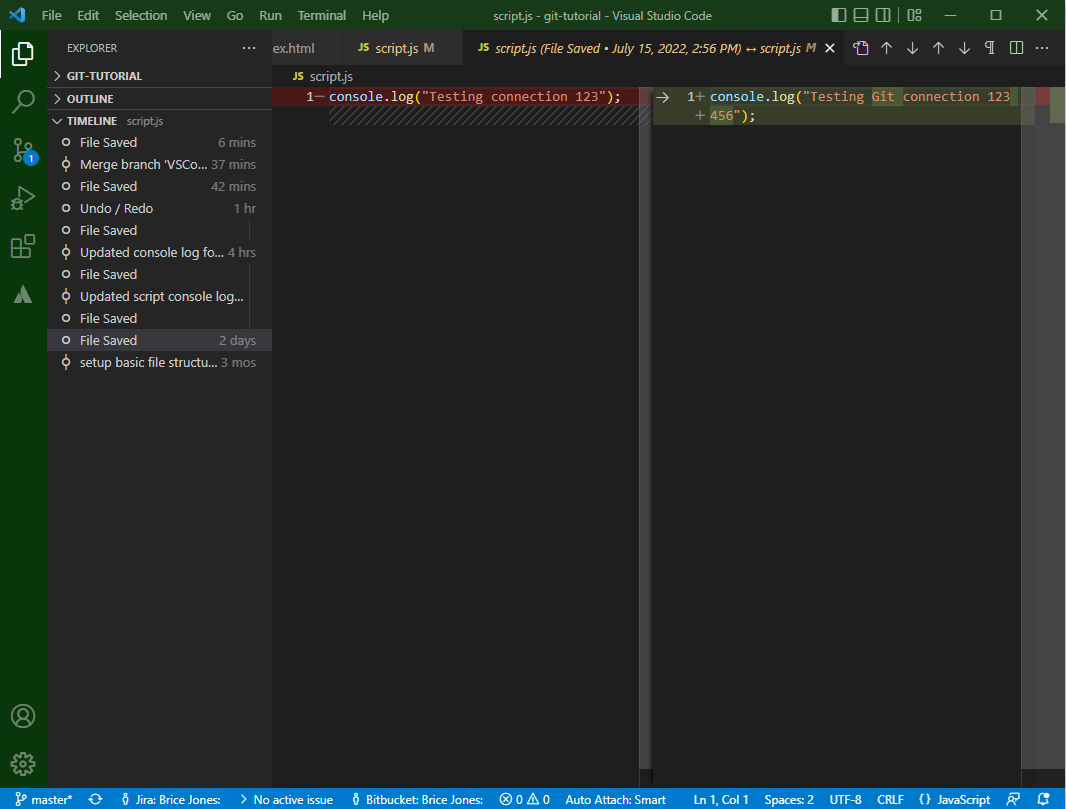
Next, the ‘Git: Merge Editor’ and ‘Merge-conflict › Auto Navigate Next Conflict: Enabled’ options can be very useful when dealing with a merge that has a lot of conflicts. As you can see from the merge editor pictured below, these options make it easy to tell exactly what’s happening when you merge. Once you have solved one conflict, it automatically moves on to the next. No manual searching for merge conflicts required! This is especially handy when searching through several thousand lines of code.
The Timeline found in the Explorer panel displays an extensive list of changes made to the currently opened file. This can be pretty useful when your code suddenly no longer works, and you have to figure out what has changed from an earlier version that could have caused it to break.
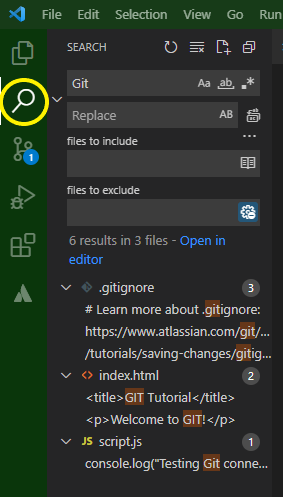
Last but certainly not least, we have the Search Panel. This can be an enormous time saver when working on larger and more complex projects, allowing you to search through every file in your project for a given string. It also has options for case sensitivity, matching only whole words, and even an option to input a regular expression.
What’s Next?
VS Code has many more useful features than I could get into in this article, and I haven’t even talked about extensions! If you want a more in depth article on VS Code tips and tricks that our developers use, let us know on Twitter or via e-mail. Don’t forget to subscribe to our blog to learn more as our series on Version Control and Git continues!
GIT Series
- Version Control Could Save Your Life
- Are You Using the Right Type of Version Control System?
- GEO Jobe’s Guide to Getting Started with GIT