In GIS workflows, there are several ways to accomplish the same task. From symbology configurations to analyses, each person has their way of doing things. Sometimes, though, a project requires that multiple staff members adhere to the same requirements. To design a seamless workflow, users can create tasks in ArcGIS Pro and share project templates to help maintain consistency. At GEO Jobe, we use these features for projects that utilize the same geodatabase schema, symbology, and workflows. It makes distributing work amongst staff very easy while ensuring that nothing is forgotten and preventing discrepancies. Below you will find tips and tricks for creating and implementing tasks and templates into your workflows.
Tasks
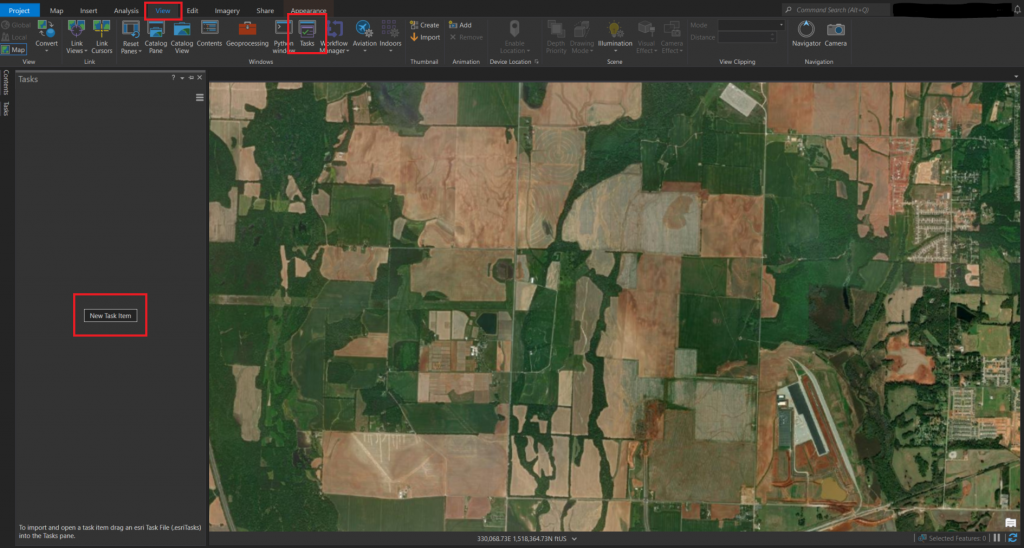
When a project’s workflow is repetitive, a great way to streamline and improve the accuracy of the process is to create tasks as a guide for the GIS analyst. Since the analyst does not have to remember countless steps or refer to an external workflow document, ArcGIS Pro tasks are a great time-saver. Once you create a new task, under the View tab you can add all of the steps by selecting the New Task Item in the Tasks pane.
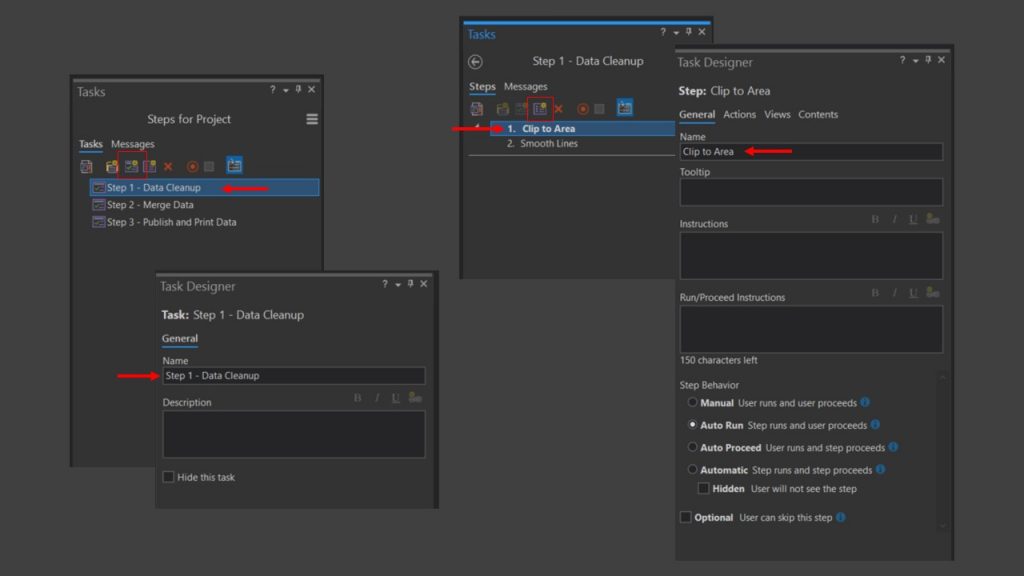
For each step, you can include instructions on operating the tool, customize how it runs, proceed, and (optionally) set it as Optional. You will then configure the Actions to run a geoprocessing tool. Once the tool is selected, you can set any default parameters. This can be done either manually or you can record the process and allow ArcGIS Pro to do the work. Recording the step is helpful if you use a command instead of a geoprocessing tool, like adding data, for example. If you set this step to “Auto Run” on the General pane, it will automatically open the Add Data tool.
The next step in creating your task is to configure which map or scene will be opened for each step. If you will be using multiple maps and scenes in your project, it is best to give them a generic name, like Production Map or QC Map. This will ensure that the correct map is opened when you use your tasks in projects other than the one used to create them.
Templates
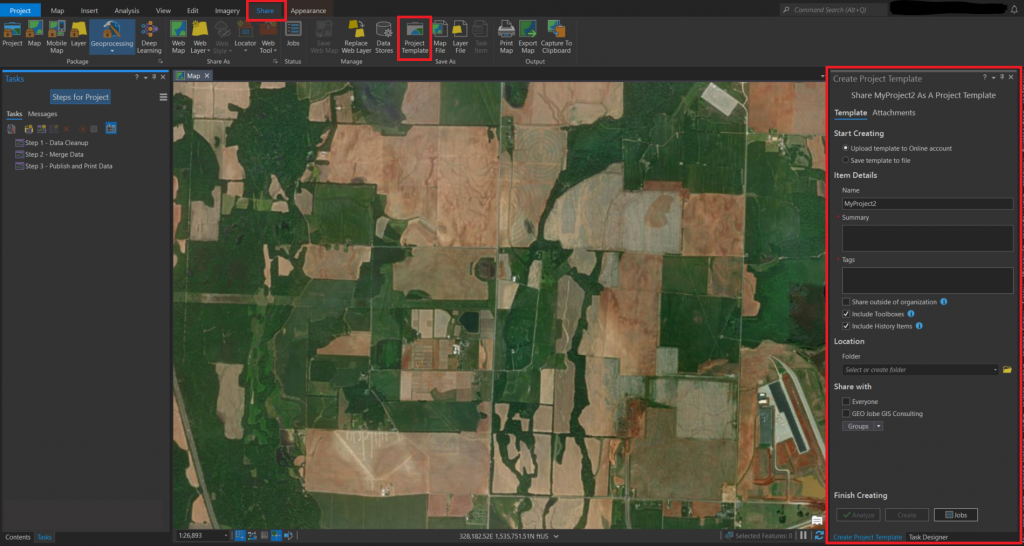
Once the tasks are set up, you can now create a template. This will maintain symbology, tasks, geodatabases, and toolboxes. On the Share ribbon in ArcGIS Pro, you will save your work as a Project Template and choose to publish directly to your portal or save it as a file on your local machine. There is no wrong way, so pick what works best for your workflow.

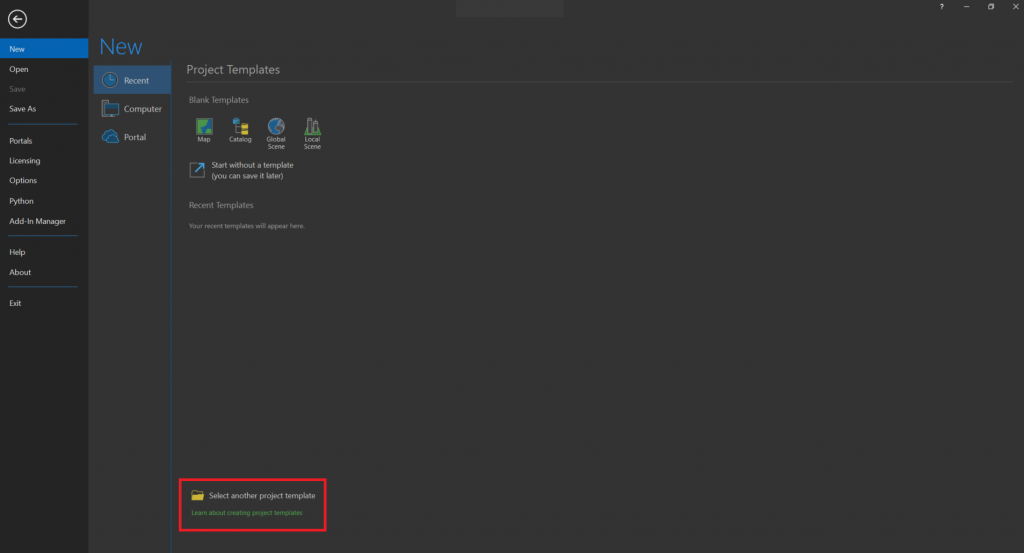
Now your team is ready to collect data and get on with the project! To open the template, you will open ArcGIS Pro and click on “Select another project template”. Then navigate to the template you’ll be working with and a new project (including everything you need) will open.

From there, your team will have a clean consistent product! Hope this helps you create a seamless workflow for your future project!


