


In a previous GEO Jobe blog article, we began the process of setting up a React application to develop custom ArcGIS Map widgets as React components. This article takes the next step in creating custom widgets by introducing some actual functionality to our example CustomWidget.
Note: This tutorial assumes a basic understanding of building web applications using React. The link to the complete project code for this tutorial will be provided at the end of this article.
Main App Component
Since we will be introducing extra complexity into our example app, we will first need to edit the main App component to better handle the additional state management that will be necessary as the application grows. If we plan to add multiple custom widgets all performing operations on the map, the App component will eventually need to track some amount of app-wide state to keep things in sync.
Let’s start by converting the App component to a class (stateful) component. Here is a complete view of those changes to App.js (line-by-line explanations to follow).
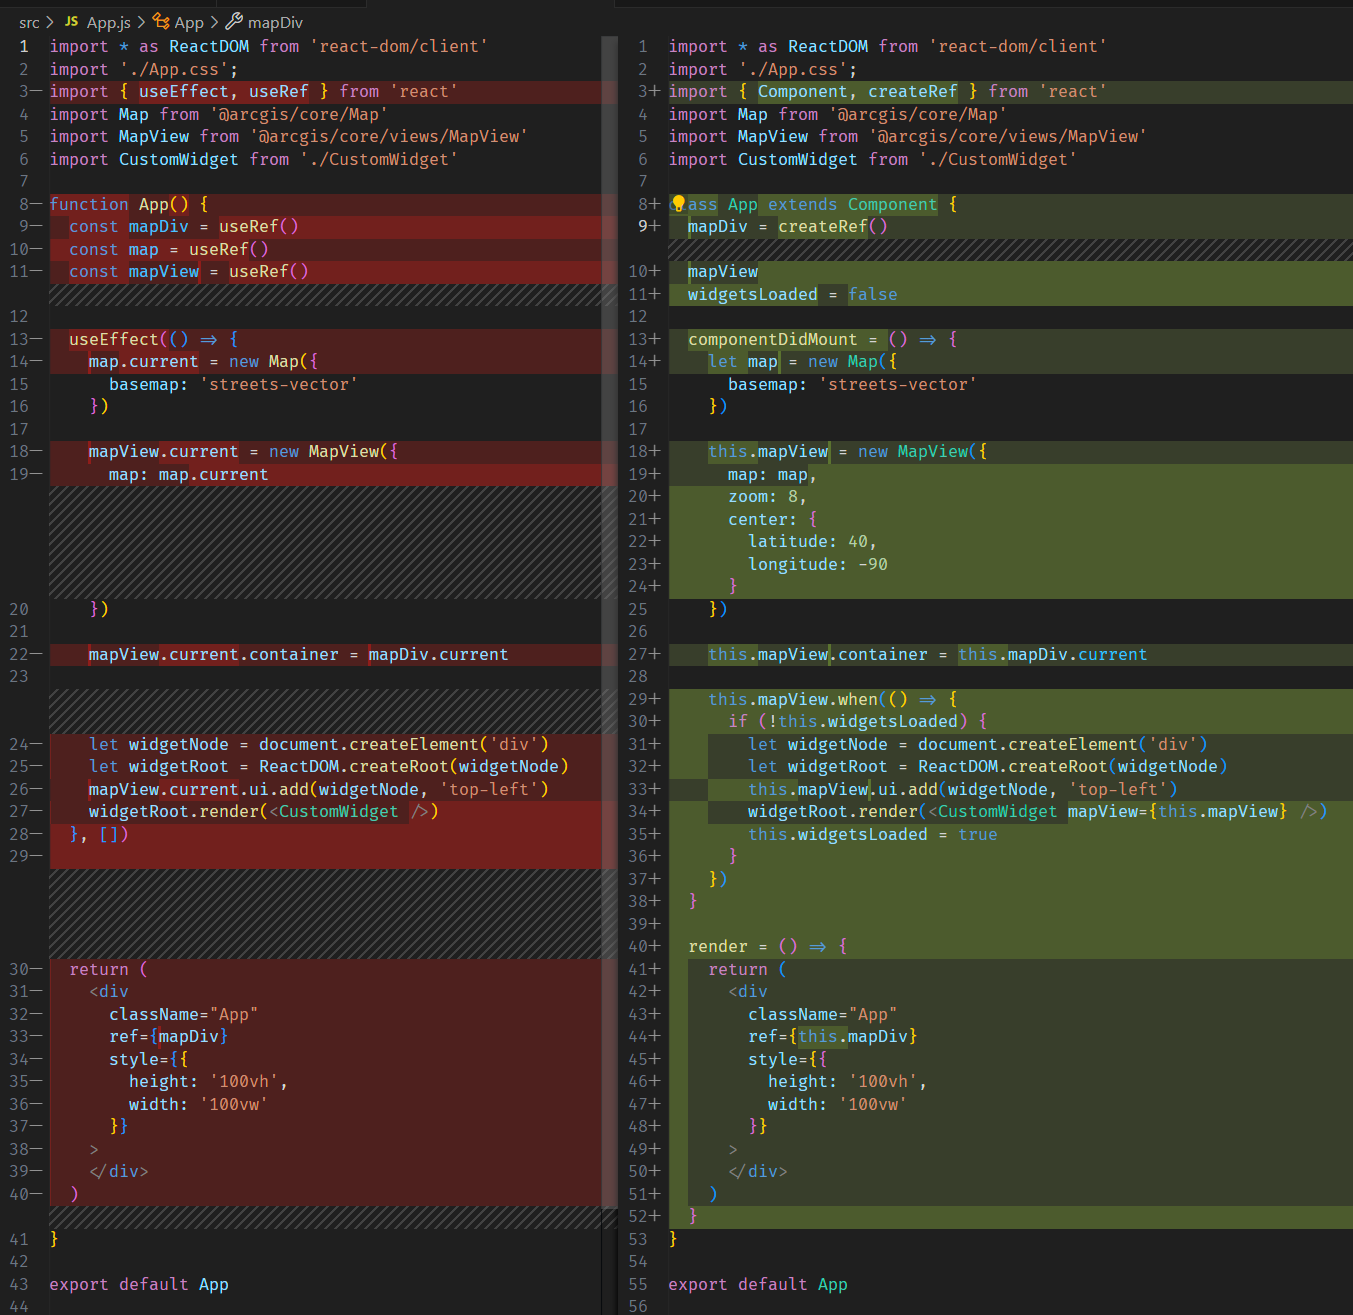
Since we are converting the function component (stateless) into a class component (stateful) we need to change our React imports. Change line 8 to declare a class instead of a function and inherit from React’s Component class.
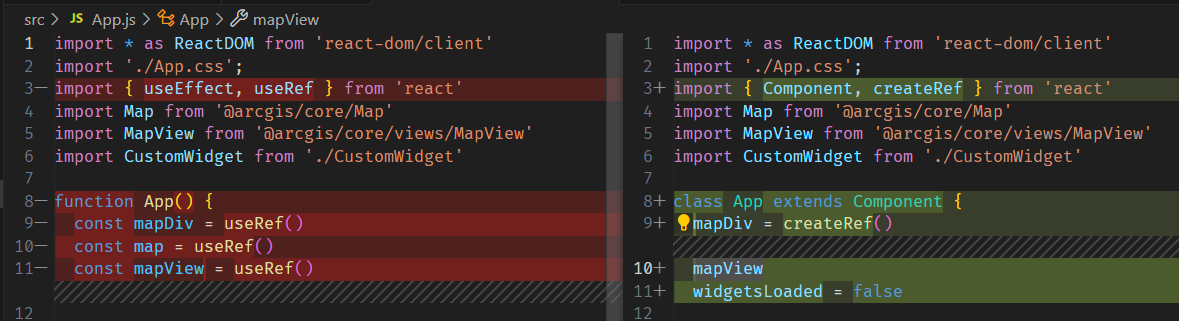
Then, the mapDiv Ref of the map container becomes a member of the App component class and is created via the createRef() instead of useRef(). We can remove the map Ref (we’ll access it via the mapView) and mapView can now just be a class member that we define on construction.
The widgetsLoaded member is used later so go ahead and add it now.
Next, instead of using the useEffect hook, we’ll leverage the componentDidMount lifecycle method to do all of the necessary setup the app needs to do immediately on load.

We cannot use the constructor here. The reference to the map container element will not be ready at that point.
At this point in the code in Part 1, we added our custom widget to the mapView’s UI but now we want to give our custom widget the ability to reference and modify the app’s map so we need to provide the widget with a reference to the MapView. It is important to remember we don’t want to pass a reference to an unloaded MapView. We can use the MapView’s .when() method to ensure that the instance of the map is created and loaded before creating any widgets and then passing the MapView to those widgets.

Note: the widgetsLoaded member we created earlier is used here to prevent creating the widget twice. The .when() method of the MapView fires twice on load.
We pass the reference to the MapView like you would for any other React component, via its props.
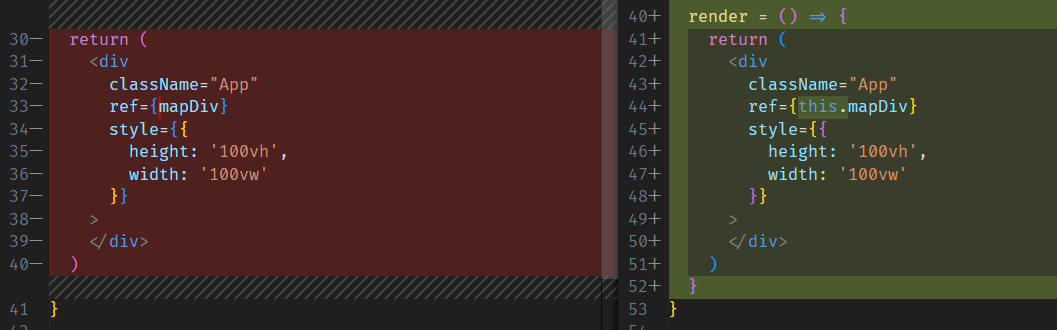
The last step for the App component is moving the template, initially returned as the value of the previous function component, to now serve as the return value of the render() method in the new class component.
Finally! We can now create the code that actually does stuff in the CustomWidget.
Custom Widget Component
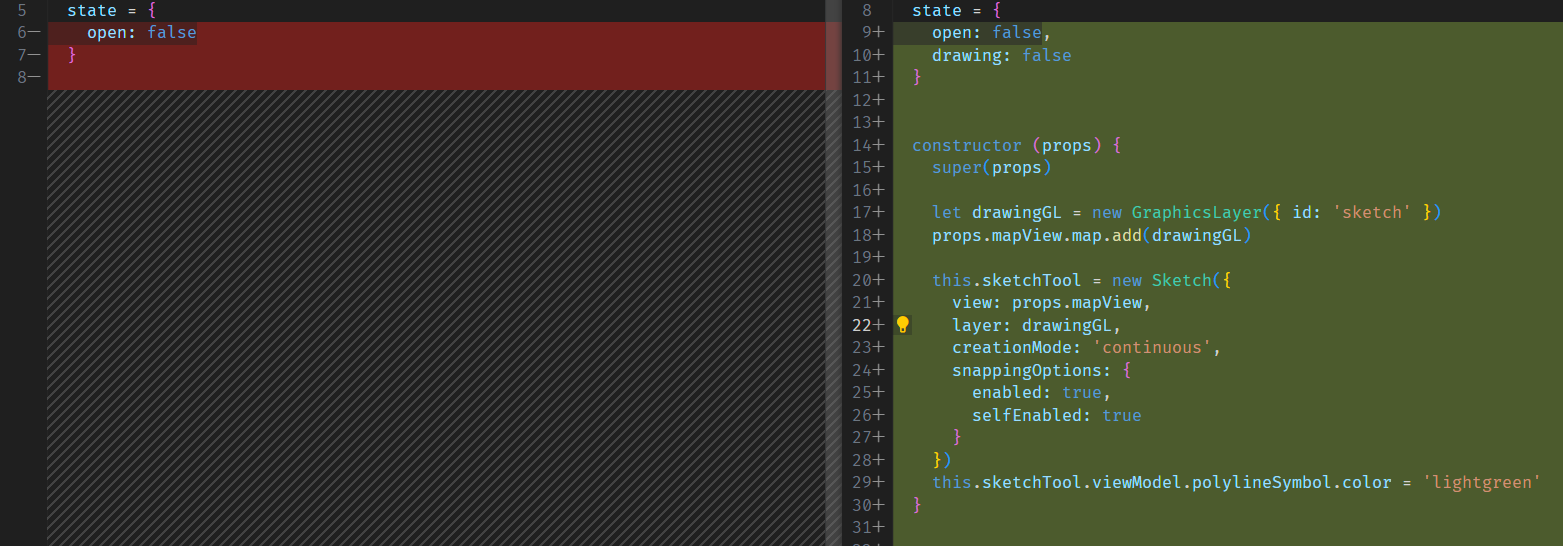
Let’s modify the CustomWidget from Part 1 to allow the user to draw graphics on the map. The resulting changes to CustomWidget.js will look something like this.
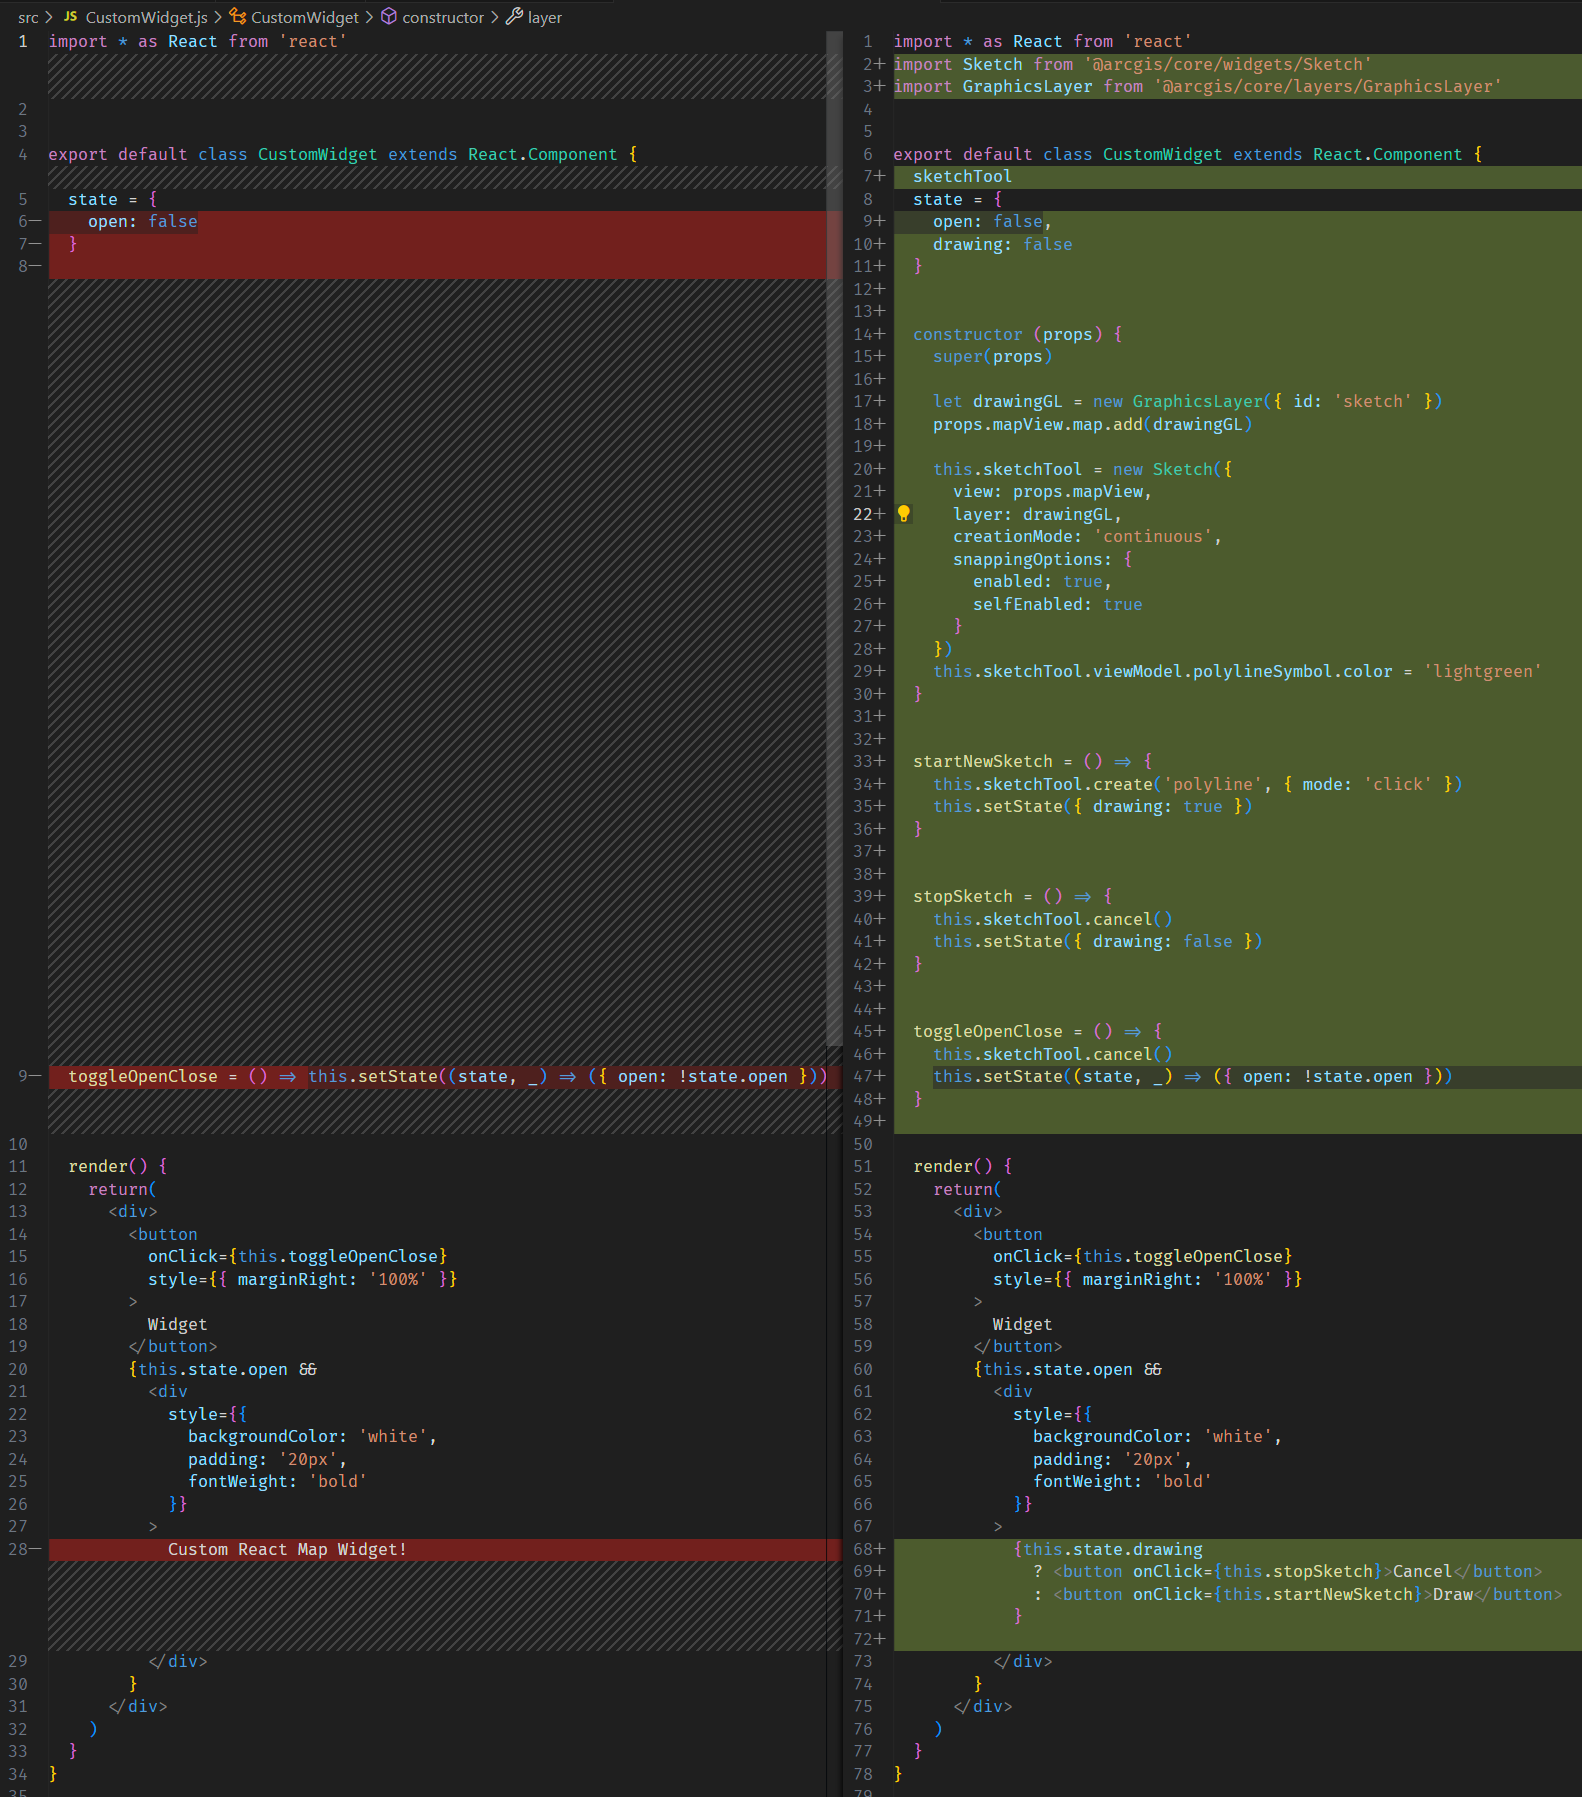
Taking a closer look from the top, we first need to import the necessary ArcGIS Maps SDK resources to support our new functionality. We’ll be using the Sketch widget, which will need a GraphicsLayer to draw on. Once we set up the Sketch widget, we’ll assign it to a class member to access it across the lifecycle of the widget by declaring a sketchTool class member.

Add a drawing property to the state object so the app can make UI changes based on when the user is currently drawing or not.
In CustomWidget.js we don’t need to wait on the MapView to load or for any reference elements to mount so we can use the constructor to do set-up work (don’t forget to call super()). The component’s props now contain a reference to the MapView, which we can pass along to the SketchWidget, along with the drawing GraphicsLayer.
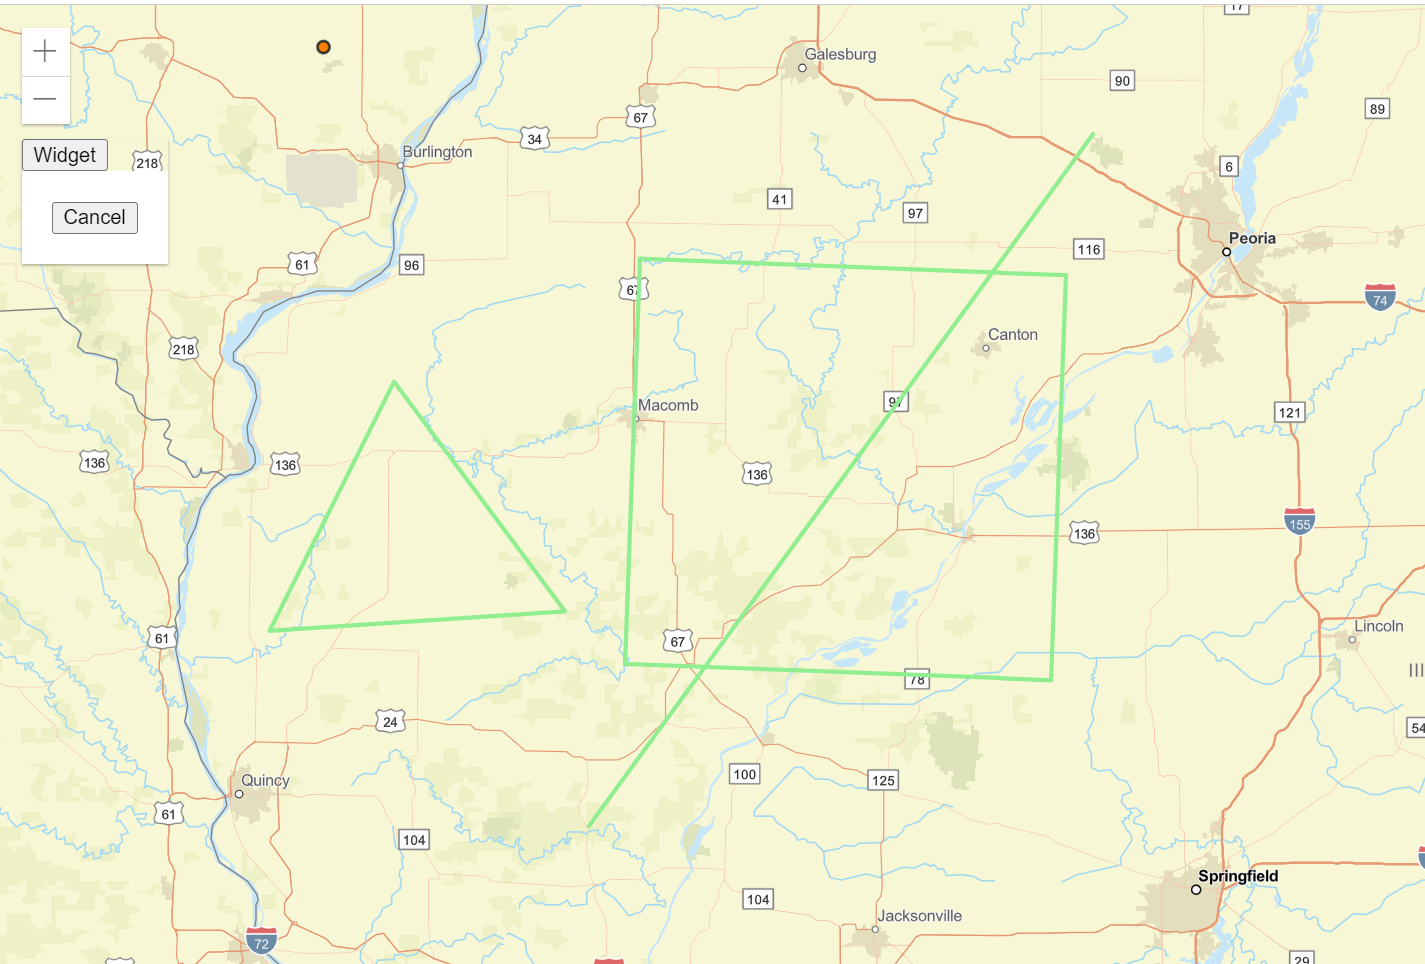
Let’s jump down to the template of the CustomWidget and add some buttons for starting and canceling a sketch.

The above JSX will render either a Draw button or a Cancel button depending on the new drawing state property. Event handler functions are bound to each button’s onClick event to perform the appropriate action.
Jumping back up a few lines, we can define those handler functions.

The handler functions will control the sketch tool by toggling the drawing state property triggering the template to update and display the necessary button.
Finally, we’ll want to cancel any current sketches if the user closes the widget.

To test the new draw widget, start the app’s dev server by running npm start in the app’s root directory and opening a browser tab to http://localhost:3000. If the server was already running, the changes we made should have already been rebuilt and reloaded in the browser tab.

This two-part journey has guided us through:
- Creating a React application
- Creating an ArcGIS Map-compatible custom widget as a React component
- Transitioning a component from a function (stateless) into a class type (stateful)
- Leveraging the ArcGIS Maps SDK for JavaScript to draw polygons on a map
Using the knowledge gained from this series, we now have exciting possibilities for creating powerful and customized widgets on our maps with functionalities we may not ordinarily have from an out-of-the-box, drag-and-drop widget.
We encourage everyone to continue developing this application as their own. As promised, the link to the code is here, and we would love to hear what you come up with! If you have any questions, feel free to reach out to us through connect@geo-jobe.com.